Do you have any issues when you want to install Ubuntu or other Linux distributions on your Microsoft Surface devices? By default, Microsoft has blocked all third party boot loaders from booting off your Surface devices.
To fix this, you will need to disable the secure boot on your Surface so you can install a different operating system or do a clean Windows installation. In this tutorial, we will walk you through how to disable and re-enable Secure Boot on Microsoft Surface Laptop.
Table of contents
What is Secure Boot?
Secure Boot is a new security feature that available only on PCs that has UEFI enabled to blocks the loading of uncertified bootloaders and drives. It helps to prevent your Surface from being loaded with unauthorized operating systems and malicious software applications. All Surface devices ship with Microsoft’s certificate stored in UEFI to verify boot loader integrity before launching it.
There are three options available in Microsoft Surface Laptop UEFI for the Secure Boot setting.
Secure Boot is configured by selecting a Secure Boot certificate keyset. There are three keysets to choose from on this PC.
- Microsoft only: Only boot software signed by Microsoft will execute on the PC.
- Microsoft & 3rd-party CA: Boot software which is signed by Microsoft or the Microsoft Corporation UEFI CA 2011 will execute on the PC. Choose this option for compatibility with 3rd-party UEFI software and drivers.
- None: No keyset is installed and Secure Boot is disabled. Any boot software will execute on the PC. This configuration is not recommeded and should only be used by advanced users.
How to disable Secure Boot on Surface Laptop
To disable secure boot on Microsoft Surface Laptop:
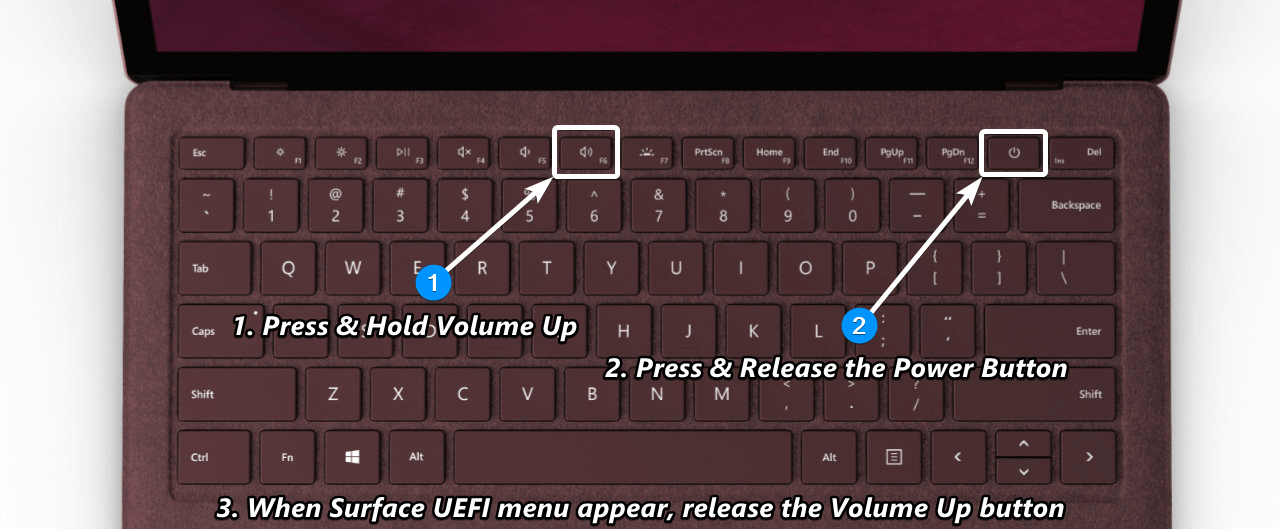
- Shut down your Surface Laptop.
- Press and hold the Volume Up (F6) key on your Surface, then press and release the Power Key next to the Del key.
- When you see the Surface logo appear, release the Volume Up button. The Surface UEFI screen will appear in a few seconds.

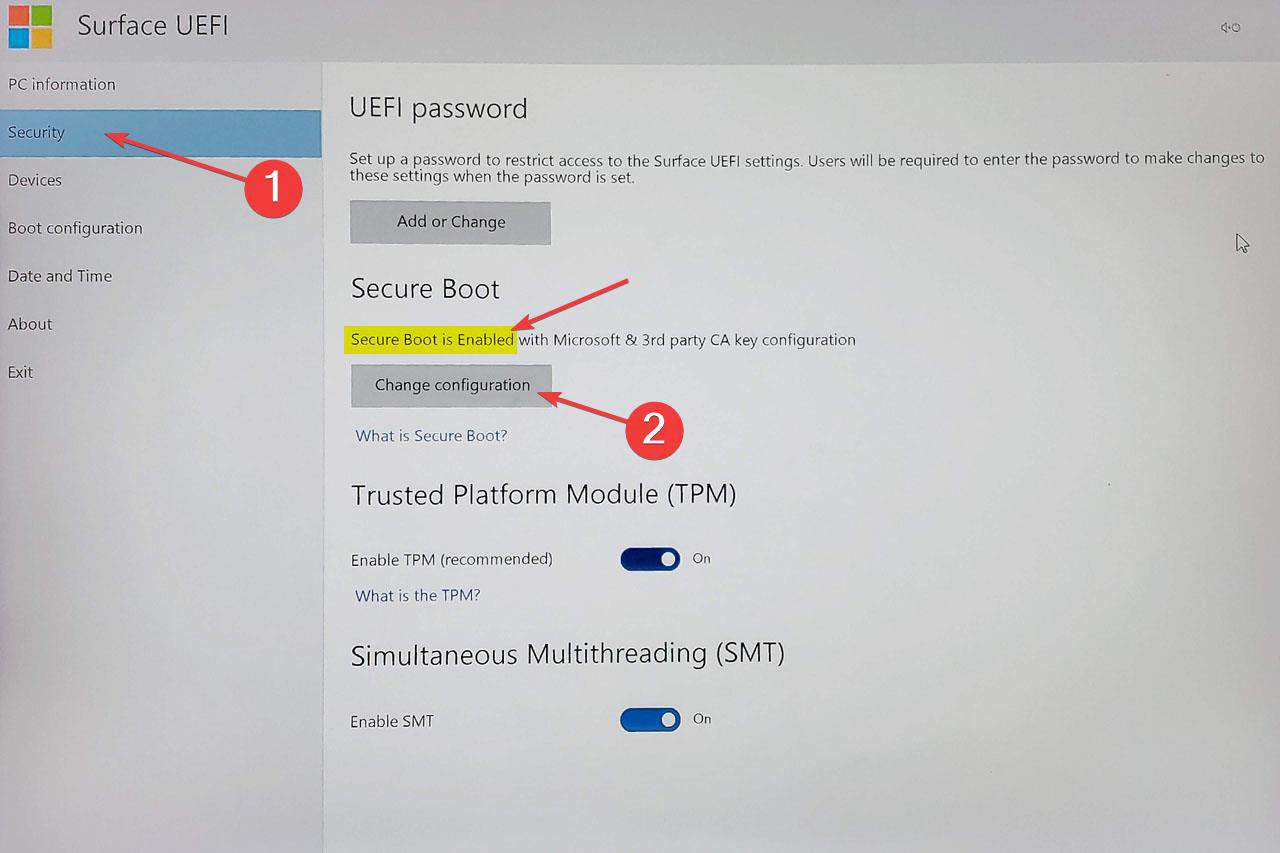
- Go to the Security page, under Secure Boot section click Change configuration.
You can notice that the current setting for Secure Boot is Enabled.
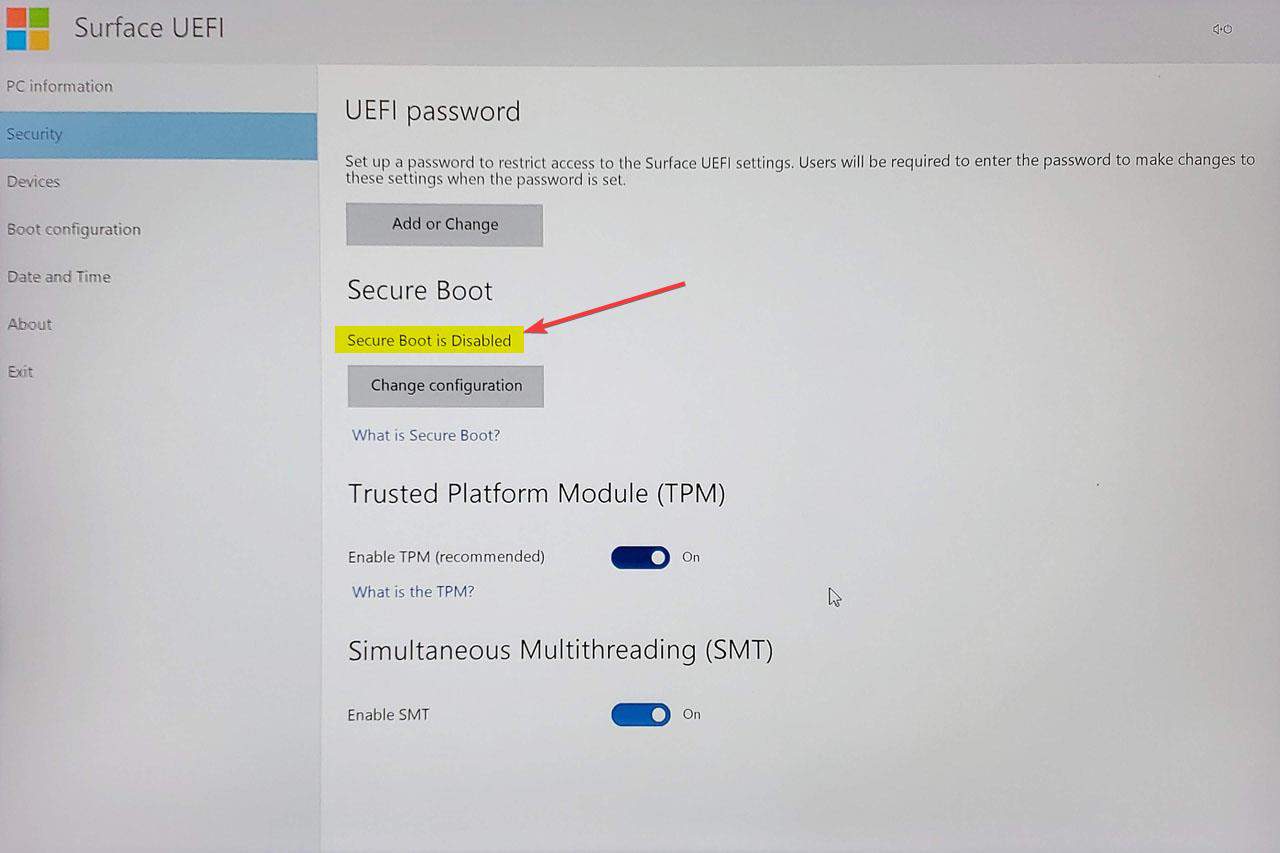
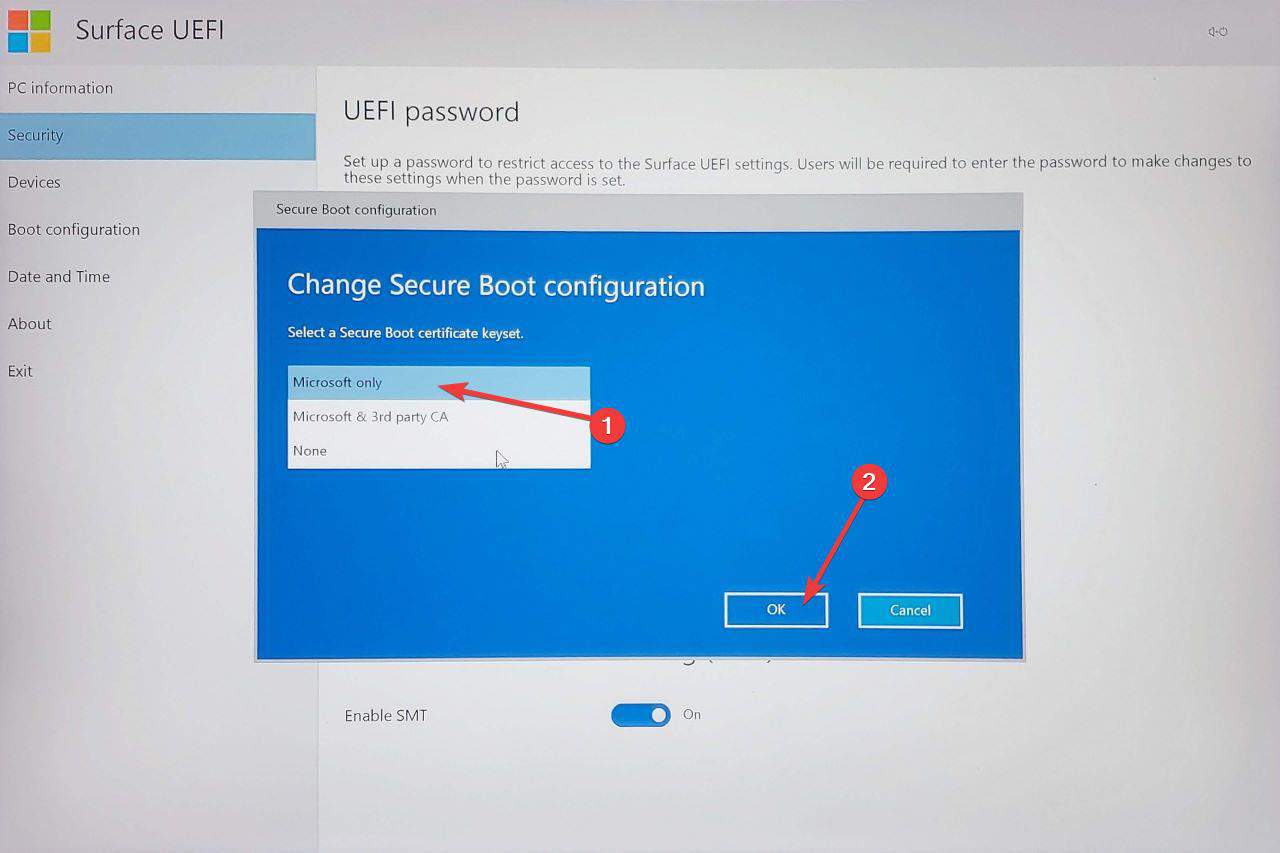
- On Change Secure Boot configuration dialog, change the option to None, and click OK to apply the option.
- Now the current setting of Secure Boot will be changed to Disabled.
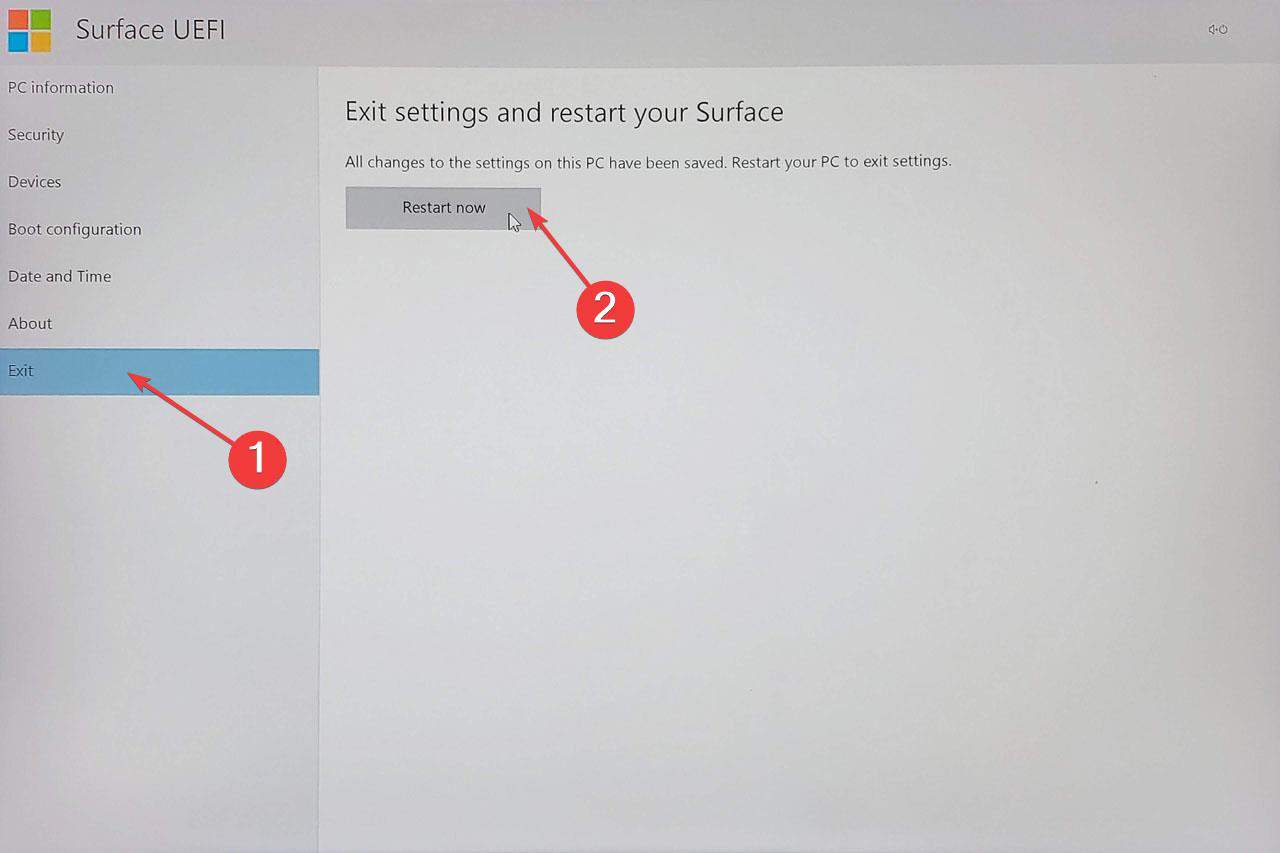
- Now go to the Exit page, and click Restart now to save the settings and restart your Surface.
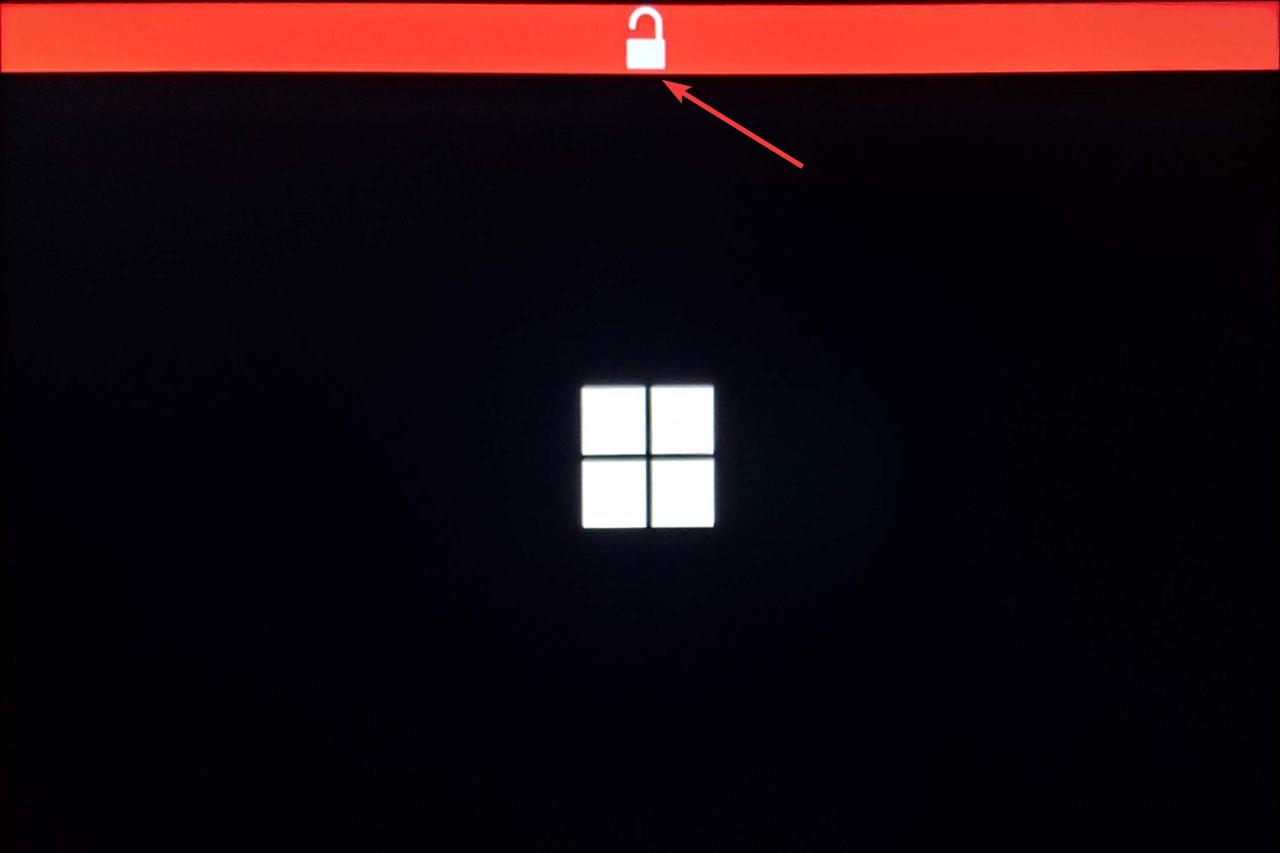
- After rebooting, if you see a red bar with an unlock icon in the middle, it means the Secure Boot is successfully disabled.

How to re-enable Secure Boot on Surface Laptop
When you finish your OS installation, you should re-enable the Secure Boot option to protect your Surface from malware and to remove the red bar on your device’s boot screen when it startup. To do so:
- Follow all the steps above to go to the Security page.
- Make sure to select Microsoft only if your current OS is Windows 10, and click OK.
- Now go to the Exit page, and click Restart now to save the settings and restart your Surface.
More on Surface Laptop Tips & Tricks
Here are some related articles for Microsoft Surface Laptop tips & tricks you might want to read:
How to Manage Asset Tag on Microsoft Surface Devices
Microsoft made an easy tool for system administrators to manage asset tags on Microsoft Surface devices, and here is how to do that.
How to Properly Shut Down a Surface Laptop
Don't know how to shut down your Surface Laptop in a proper way. Here are the recommended practices to correctly shut down your Surface Laptop.
How to Check Your Surface Warranty Status
Have trouble with your Surface devices and want to get support from Microsoft? Here is a quick and easy way to check your Surface's warranty status before you make a support request.
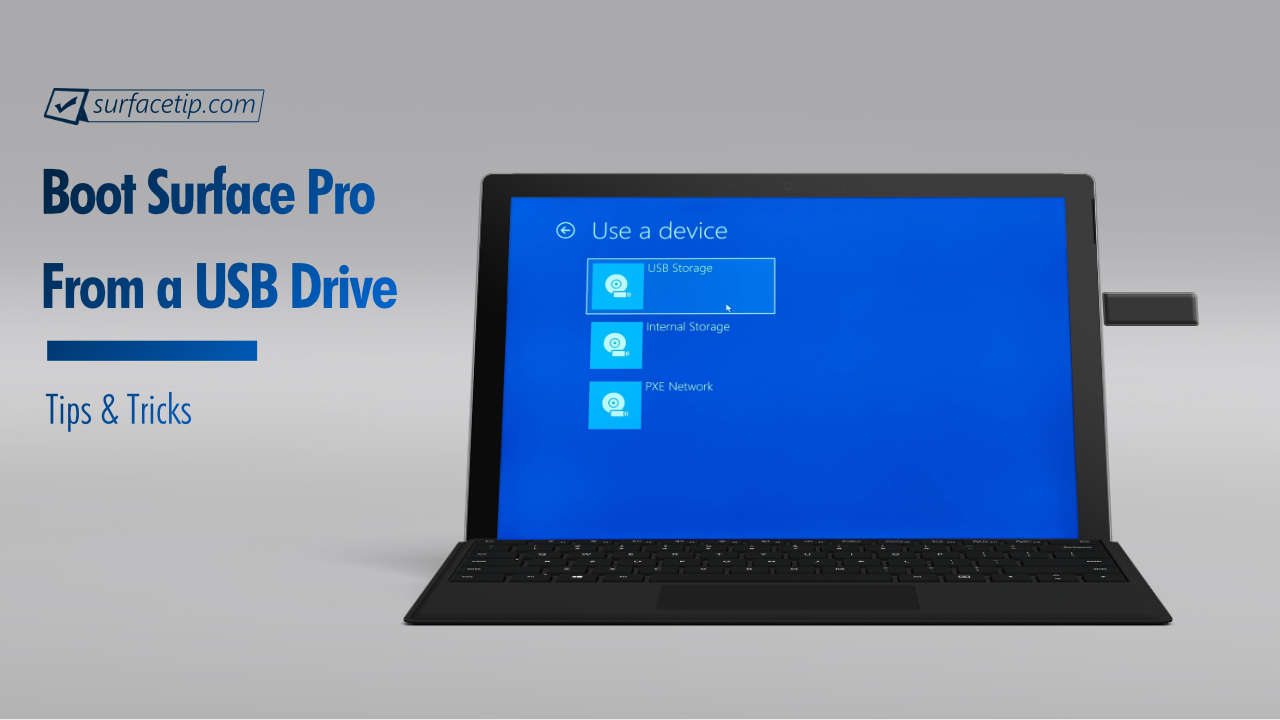
How to Boot Surface Laptop from a USB Drive
In this article, we will show you three different methods to boot your Surface Laptop (original, 2, 3, 4, 5) and Surface Laptop Go from a USB Drive.

How to Disable Intel Turbo Boost on Microsoft Surface
This tutorial will briefly introduce the Intel Turbo Boost Technology and how to turn off the feature so your device will run cooler and stay longer when needed.
How to Download Microsoft Surface Drivers and Firmware
Here is how to download and install the latest drivers and firmware from the Microsoft Download Center on your Microsoft Surface devices.


COMMENTS
Let us know what you think!
We appreciate hearing your thoughts, questions, and ideas about “How to disable secure boot on Microsoft Surface Laptop”.