Having a dual or multiple monitor setup can be very helpful in multitasking. My office has a triple monitor setup, including my main Surface Book display and two other external displays: an LG 29-inch ultrawide and a Dell 21.5-inch monitor on either side via Surface Dock. This setup allows me to view and work on multiple websites simultaneously, up to six websites side by side, which is particularly useful for research, writing articles, and other tasks that require a lot of screen space.
I also use a portable, dual-monitor setup when working outside my office. Although I don’t have a dedicated portable monitor, I have found that my Surface 3 with a built-in kickstand works well as a portable wireless display. This allows me to browse the web and efficiently perform most other activities.
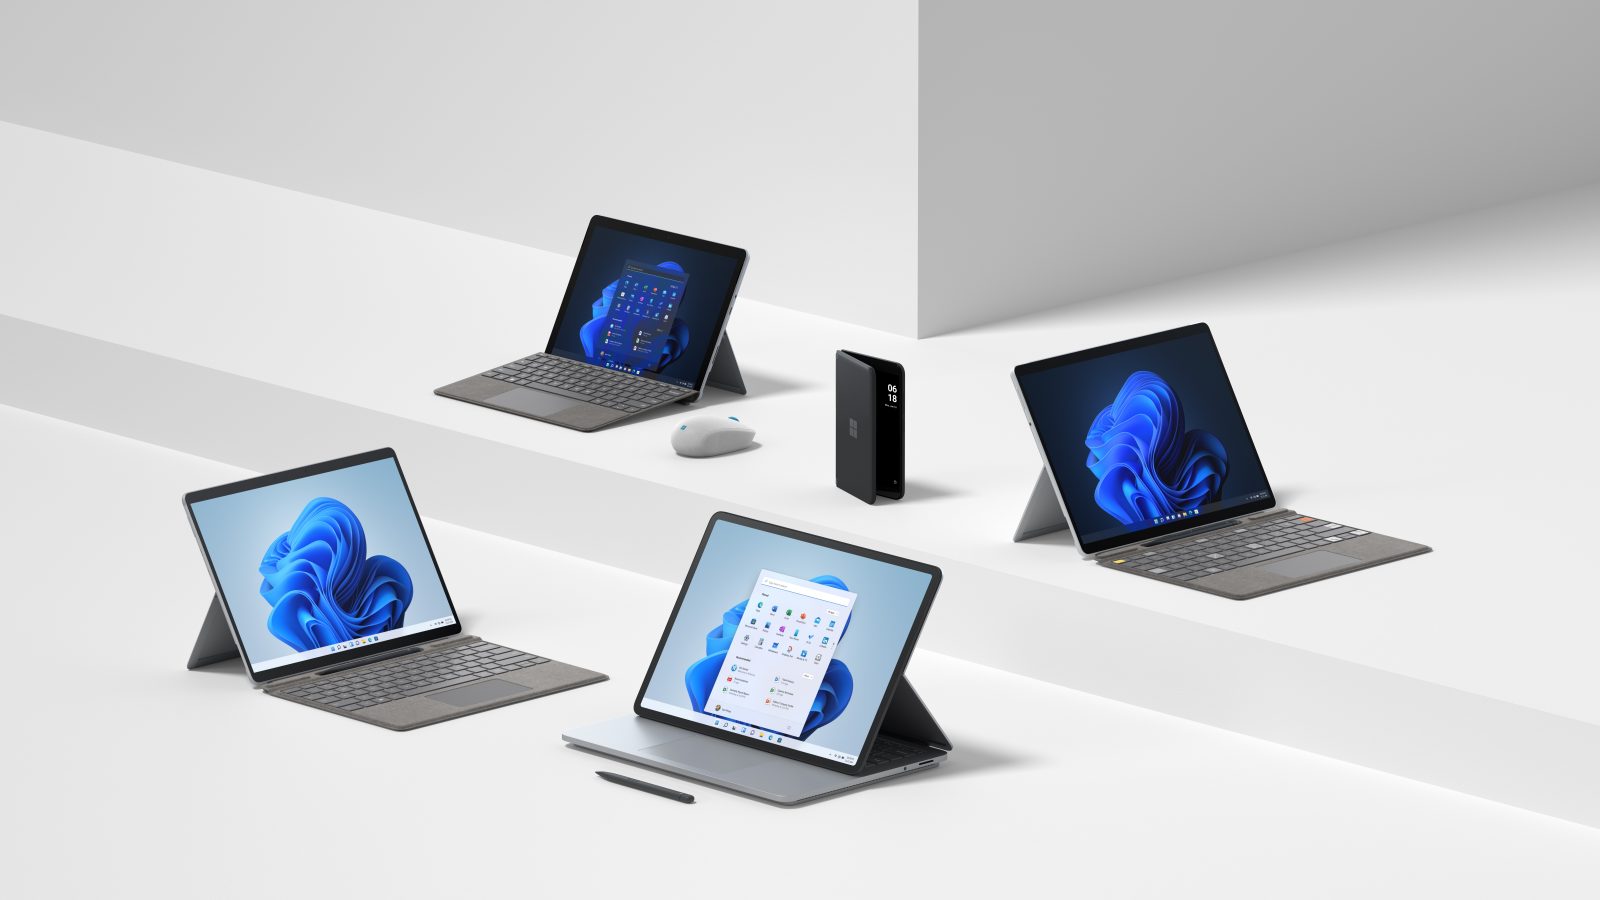
In this guide, I will provide step-by-step instructions on connecting and configuring any Surface device, including Surface Go, Surface Pro, Surface Laptop, and Surface Book, as an external screen or projector.
Table of Contents
Preparing your Surface PCs
Before you continue, make sure both your Surface PCs meet the following requirements:
- Running Windows 11 or Windows 10 (with Anniversary Update or later).
- Connecting to the same Wi-Fi network.
- Surface PCs with the Miracast protocol Support. Fortunately, all Surface lineups except the original Surface RT support these protocols. Click here for detailed Surface support for Miracast.
In this scenario, I will use my Surface Book as the main PC and a Surface 3 as a portable monitor like the picture above. Let’s get started!
Configuring a Surface Pro as a second monitor
To configure a Surface as a wireless display on Windows 10, do the following:
- Open Settings.
- Click on System.
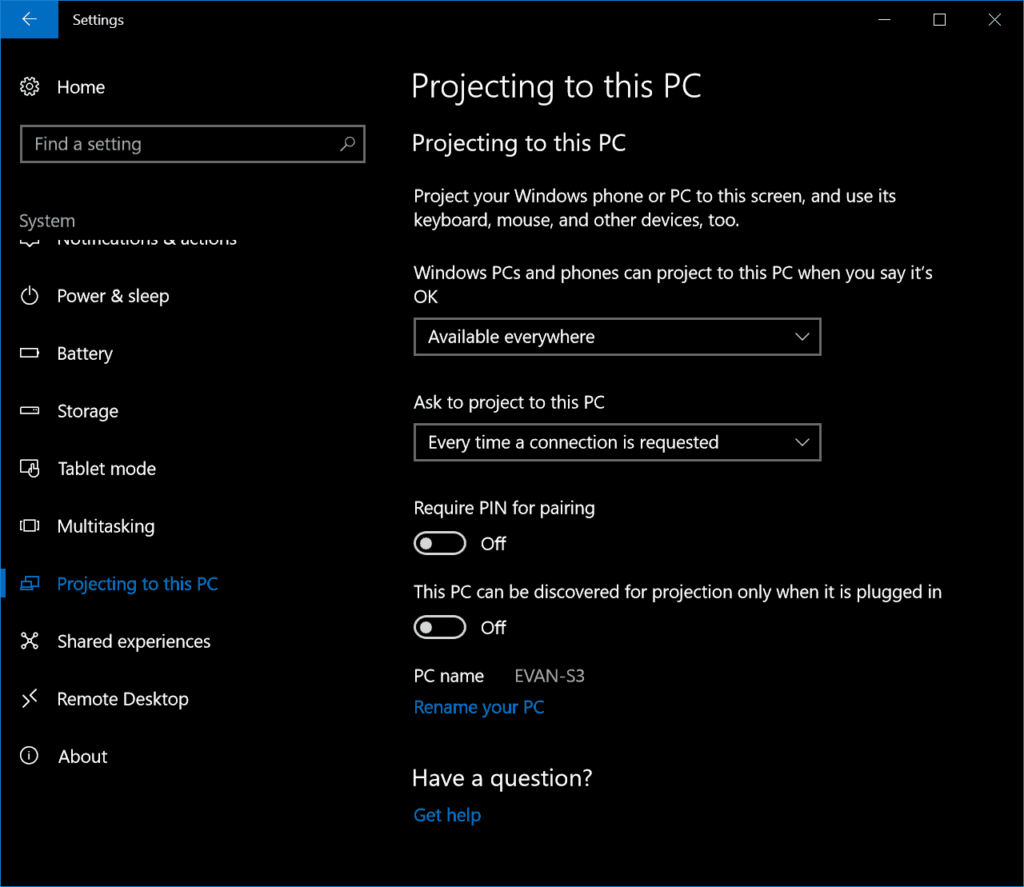
- Click on Projecting to this PC.

- Select “Available everywhere” or “Available everywhere on secure networks” from the first option.

- Select “First time only” or “Every time a connection is requested” from the second option. If you don’t want to confirm every time you connect, choose the First time only option.

- Turn on the Required PIN for pairing if you need extra protection.
- Ensure you turn off the “This PC can be discovered for projection only when plugged in, as you will use your Surface PC as a portable display.
- Finally, you must confirm Yes when you project from another computer to this PC.


Projecting or casting to your Surface
Once you have configured your Surface to accept projection On your main PC on Windows 10, do the following:
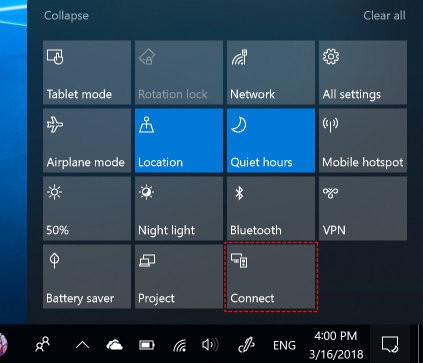
- Open the Action Center icon.

- Click the Connect button.

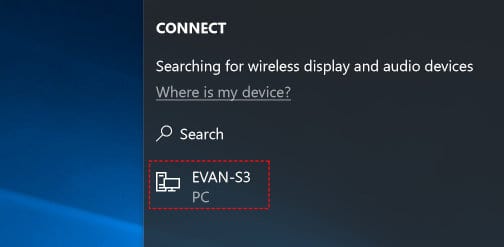
- Click the name of the remote wireless display PC (Surface 3) you want to project. Depending on your configuration, you may need to confirm the connection on another PC (Surface 3). If the connection fails, you will need to try again.

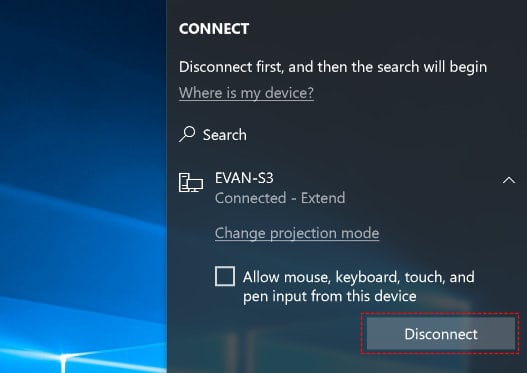
- Once connected, Tick the “Allow input from a keyboard or mouse connected to this display” check box if you also want to use the remote computer (Surface 3)’s mouse, keyboard, touch, and pen input on your main PC (Surface Book).


Changing projection mode
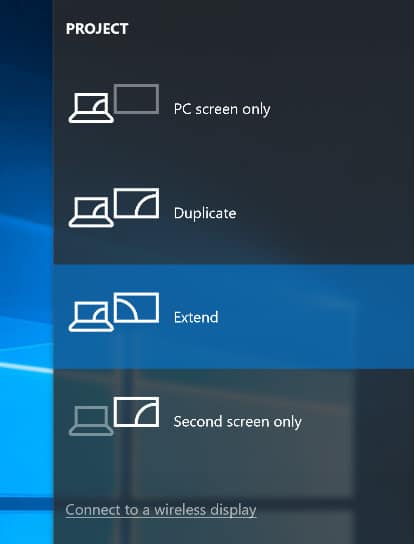
You can change the projection mode as a real connected monitor by clicking on Change projection mode, pressing Win + P on your keyboard, or going to the Display settings. You can adjust the dual screen projection as:
- PC screen only – Only display on your main PC screen.
- Duplicate – Mirror content from your main PC to your Surface Pro screen.
- Extend – Having an extra desktop, you can place different content on your Surface screen.
- Second screen only – Turn off your main PC screen.
Disconnect the projection
Finally, when you finish your work, click Disconnect to stop your connection.
FAQs
Can I use a Surface Pro with a cable as a monitor?
Using a Surface Pro or a Windows tablet as a second monitor with a cable is impossible. All Microsoft Surface devices use Miracast wireless technology to support the “Project to this PC” feature on Windows 10 and 11.
Can I use Surface Pro as a monitor for Mac?
Apple doesn’t natively support the Miracast wireless technology used on Surface Pro or any Windows tablet and Miracast TV.
However, some apps on the Mac App Store provide workarounds that allow you to mirror the Mac screen or project specific apps to compatible TVs. Those apps include the Screen Mirroring Cast App by MeisterApps, Mirror My Screen, and others.


COMMENTS
Let us know what you think!
We appreciate hearing your thoughts, questions, and ideas about “How to Use Your Surface Pro as a Second Monitor”.
Im deciding to buy a tablet rn and seeing this article made me wonder if connecting a Surface Pro to my workshop desktop or gaming laptop could work as an additional pen display (like a Wacom Critiq?) it doesnt have thunderbolt or LTE support but the idea of a Critiq 2+1 in 1 would be irresistible!
so can a Surface pro be used as a Wacom Critiq alternative with fully functional pen?
I was hoping for the same, however, if your main laptop/computer does not support inking/pen input then inking is disabled on the connected display it seems
Did anybody find a solution for making the main computer think that it supports inking/pen input?
I was also planning to use surface pro more like a pen display for my gaming laptop, but my laptop doesn`t have a touch screen. If I can feed the pen input from the surface pro to my laptop it would be awesome.
You can use microsofts remote desktop app. Enable remote desktop on your laptop and then connect it from your surface. I am able to use my surface as touch input device using this function. But both should be on same wi-fi network.
Hi, can I use a surface pro as a second monitor when my main computer is a mac?. I wouldn’t mind using any type of cable/adapter.
You say both devices need to be on the same network. Is it possible to just use a usb or thunderbolt (network or other cable) to connect both devices directly without connecting through some existing network?
Thanks for the article. At least I know that there is a native solution in Windows. I have a Surface 3 as well, but for me it is pretty much useless. More or less I would like to use my Surface as Rramrram would but on native resolution Surface 3’s display only can work on 24 hz which results in lags, and all in all it cannot be used as a device which could handle these type of tasks. Even YouTube has serious problems. I have an AC router, the PC’s built in WiFi also works on AC and AFAIK Surface does too. It’s good for static things like Excel or word, or browsing a website but nothing more.
Maybe I’m missing some settings…
Macs and Apples are within is a walled garden. Is does not support the Miracast standard, supported by many devices. So its a no go, regardless. If you’re on Macs, you’ll be forever trapped within Apple’s expensive ecosystem for most to all solutions, unfortunately.
I cannot discover another surface pro in the same network while doing PROJECT to second monitor, but I cannot see this surface pro when doing network discovery. Any hint to do further troubleshooting?
Thanks for that great explanation! Finally I can use my actual workhorse Surface Pro (2017) together with my old SP3 without any additional software.
Is there a troubleshooting guide? I keep getting a “Couldn’t connect to your device” message.
great article!
1 – how do I enable the battery status on the old surface pro (the monitor) – right now it’s only showing the date and time on the lower right hand corner
2 – how do I set up the old surface pro to be in a default monitor state = when I turn it on it will immediately come up as monitor? right now I need to login each time and set it to be the 2nd monitor
thanks
I wanted to buy a mini computer, and wanted to know if it’s possible to use my surface pro 4 as a monitor for it. is it also possible to do that via “projecting to this PC”?
otherwise, is it possible to do that via a (bidirectional) DP to mini DB cable? surface 4 has a miniDP port, but i’m not sure if it’s INPUT or OUTPUT only…
1.You can output HDMI from your main PC, and connect it to the surface using “HDMI to USB capture card”,
2.Then add it as “Video capture device” in OBS,
3.Project the OBS output as “Fullscreen projector”
It only works when your surface devices are on the same PRIVATE WIFI network, it does NOT work when you are connected to a public Wi-Fi network such as those at a co-working place or Starbucks. What a shame. By comparison, the Mac sidecar feature was way superior, it works with or without a wire, and it doesn’t require WIFI to work.