Rotation is crucial for Surface and 2-in-1 laptops, allowing users to switch between different modes. Automatic screen rotation is a critical feature that adjusts the screen according to the device’s orientation.
However, the rotation lock bug prevents this, causing inconvenience and frustration for users. Fixing this bug is crucial for users who rely on the versatility of their device.
Table of Contents
What is the rotation lock bug?
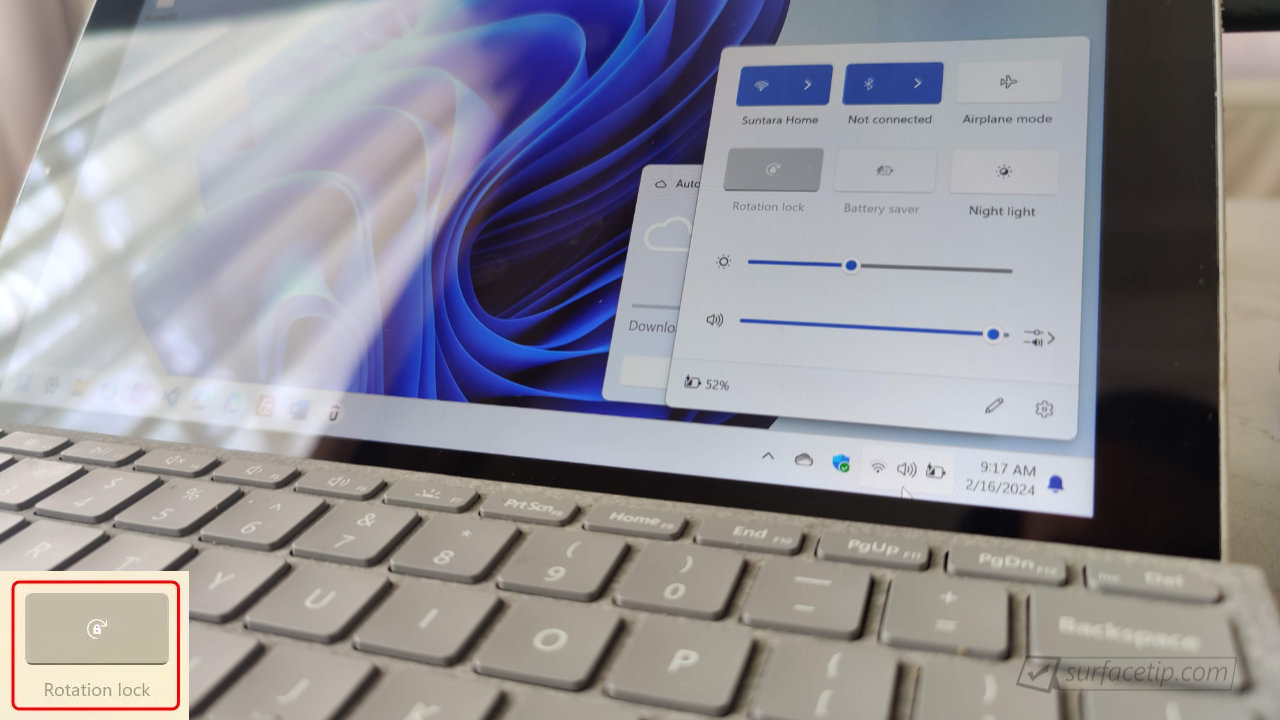
The rotation lock bug is an issue that affects Surface Go, Surface Pro, and 2-in-1 laptops that support rotation, causing the rotation lock option to be greyed out and preventing automatic screen rotation.

Usually, the rotation lock is available when disconnecting the Surface Type Cover from the tablet or switching the 2-in-1 laptop into tent or tablet mode. The bug will make the feature unavailable even if they’re in tablet mode.
How to fix the rotation lock bug
Here are some potential solutions to fix the screen rotation bug and best practices to prevent it from occurring in the future.
1. Update your laptop
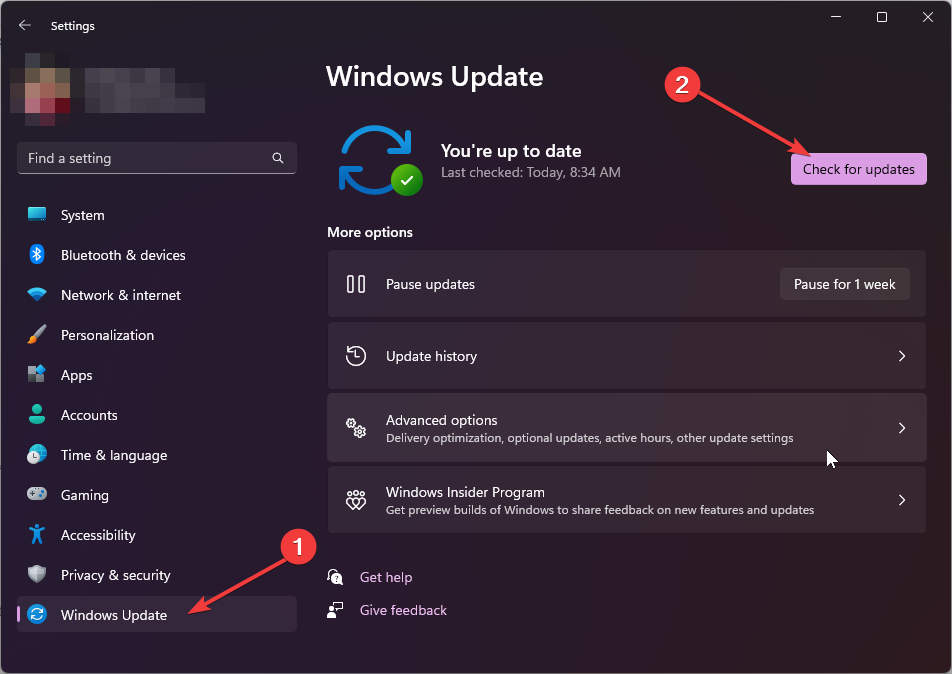
One potential solution to fix the screen rotation bug on your Surface or 2-in-1 laptop is to update your device. To do this, follow these steps:
- Go to the Start menu and click on the Settings gear icon.
- Click on the “Update & Security” option.
- Click on the “Windows Update” tab.
- Click on the “Check for Updates” button.
- If any updates are available, click the “Download and Install” button to install them.
It is essential to keep your device up-to-date with the latest software updates as they may contain bug fixes and improvements that can help resolve issues like the rotation lock bug.
After updating your device, restart it and check if the screen rotation bug is fixed. If the problem persists, try other potential solutions we introduced next.
2. Restart your laptop

Restarting your Surface or 2-in-1 laptop is a quick, simple, yet effective solution that may fix the bug. To do this, follow these steps:
- Click on the Start menu and click on the Power button.
- Click on the “Restart” option.
Alternatively, you can also perform a shutdown and then turn on your device again by following these steps:

- Click on the Start menu and click on the Power button.
- Click on the “Shut down” option.
- Wait for a few seconds until the device turns off completely.
- Press the Power button to turn on your device again.
After restarting your device, check if the screen rotation bug is fixed.
3. Reattach and Detach the Type Cover

By default, the auto-rotation feature only works when your tablet or 2-in-1 laptop is in tablet or tent mode. While in laptop mode, your computer will turn off the feature to prevent unintended rotation when you’re working. So, by switching between tablet and laptop, you can tell your system to re-activate the auto-rotation when it’s not working as expected.
You can switch between laptop and tablet mode by reattaching the Type Cover for Surface Go, Surface Pro, or Windows tablets. For more details, please follow the steps below:
- Detach the Type Cover from your tablet.
- Reattach the Type Cover to your tablet, ensuring it is properly aligned and securely connected.
- Detach the Type Cover again and check if the auto-rotation feature functions correctly.
4. Double Shutdown your Surface (Microsoft Solution)

Recently, a user contacted Microsoft support through live chat for help with their device’s auto-rotation issue. The first step suggested by the support team was to
Turn off the device completely, wait for 15 seconds, press and hold the power button until you see the Microsoft Logo two times, then in the second time you can release.
Yeyete_id on Microsoft Community
The user followed the instructions, and after restarting, the auto-rotation feature was functioning again, with or without attaching the keyboard.
5. Run Surface Diagnostic Toolkit

Running the Surface Diagnostic Toolkit is another solution that may help fix the screen rotation bug. The SDT is a tool developed by Microsoft that can diagnose and fix various issues with your Surface devices. To run the diagnostic, follow these steps:
- Download the Surface Diagnostic Toolkit from Microsoft Store using the following URL:
https://www.microsoft.com/store/productId/9NF1MR6C60ZF - Install and launch the tool.
- Click on the “Continue” button to start the diagnostic process.
- Follow the on-screen instructions to complete the diagnostic process.
Here is one step that checks for touch screen problems by tracing the spiral shape.

If the diagnostic tool detects any issues, it will suggest a solution and allow you to fix it immediately.

In this particular case, there was a problem with the Windows Update on my Surface Go. I clicked the “Fix” button to resolve the issue.
Surface Diagnostic Toolkit may detect and fix issues related to the rotation lock bug, such as device drivers or system settings. After running the tool, restart your device and check if it fixes the screen auto rotation.
Conclusion
In conclusion, the rotation lock bug is a frustrating issue that can cause inconvenience for users who rely on the versatility of their Surface or 2-in-1 laptop. However, there are potential solutions to this problem, including updating your device, restarting it, reattaching and detaching the Type Cover, performing a double shutdown, or running the Surface Diagnostic Toolkit. By following these best practices, you can fix the issue and prevent the rotation lock bug from occurring in the future.


COMMENTS
Let us know what you think!
We appreciate hearing your thoughts, questions, and ideas about “How to Fix Rotation Lock Bug on Surface Tablet and 2-in-1 Laptop”.