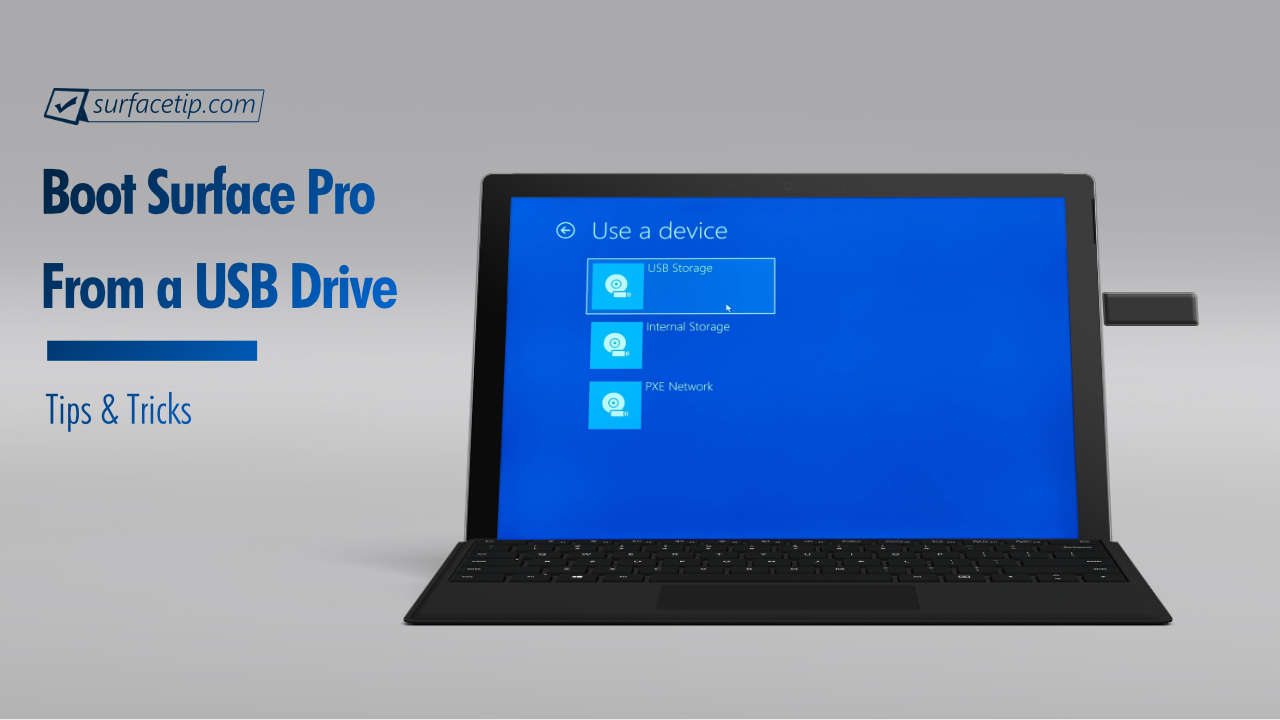
Booting a Surface Pro from a USB Drive can be frustrating if you don’t follow its specific procedure, especially when your device can’t boot to Windows. The article has everything you need to know to boot your Surface Pro from a USB Drive.
To boot a Surface Pro from a USB drive, insert the bootable USB drive into the Surface Pro’s USB port. Then press & hold the Volume down button, and press & release the power button. When the Surface logo appears, release the volume button.
If you have a Surface Pro 4, Surface Pro (5th Gen), Surface Pro 6, Surface Pro 7, Surface Pro 8, Surface Pro 9, or a Surface Pro X PC, read on for a more in-depth guide to boot your Surface Pro from a USB Drive.
Table of Contents
Why Boot Surface Pro From A USB Drive?
You need to boot your Surface Pro from a USB Drive for several reasons.
- Resetting your Surface Pro with a USB Recovery Drive.
- Fresh Windows Installation.
- Running Windows To Go.
- Installing or running Linux-based OS (Ubuntu, Fedora, Redhat, etc.).
- Load bootable recovery or disk partition tools.
Surface Pro Boot From A USB: Preparation
Before proceeding to the next step, here are some preparations you need to make before booting your Surface Pro from a USB drive.
- Bootable USB Drive – You must have a properly bootable USB Drive. If you want to reset your Surface Pro with a recovery drive, download the recovery image and create a recovery drive before you can boot it up on your Surface Pro. On Surface Pro 8 and Pro X, you will also need a USB-C to USB-A adapter if you have only a full-size USB drive.
- Disable Secure Boot
Secure Boot blocked all third-party boot loaders from booting off your Surface devices. Disable Secure Boot lets you load third-party OS other than Windows 10, including older versions of Windows and Linux on your Surface Pro. Here’s how to turn off the secure boot on Microsoft Surface Pro. - Backup Your Data
Save yourself later by backing up your important data to a microSD card or external hard drive. - Having a Wired Mouse & Keyboard
There is a chance that your Surface won’t support touch or pen input when you install clean Windows or load Linux OS on your Surface. Having a wired mouse, keyboard, and network dongle can help you in this situation. - Connected to the Charger
To prevent any unexpected shutdown during installation, make sure you have connected your Surface Pro to an external power source.
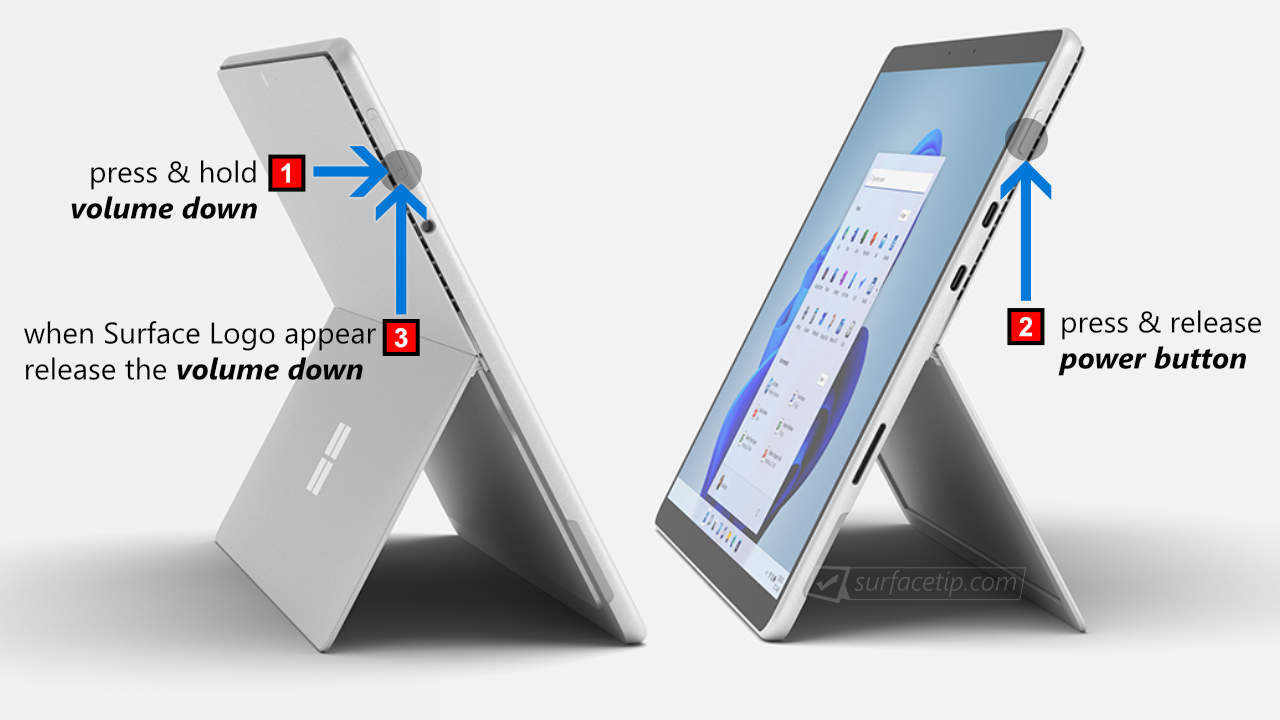
Boot Surface Pro From A USB: When It’s Off
- Shut down your Surface Pro.
- Insert your bootable USB or recovery drive into the Surface Pro’s USB port.
- Press and hold the Volume Down button on your Surface Pro, then press and release the Power button.
- When you see the Surface logo screen appear, release the Volume Down button.
Button Pressing Sequences to Boot Surface Pro 8 and Pro X from USB

Buttons Pressing Sequences to Boot Surface Pro 4-7/9 from USB.
Boot Surface Pro From A USB: When It’s On
There is an easier way to boot your Surface Pro from a USB drive when you can sign in to Windows 10 or 11. Here is how to do that:
- Insert your bootable USB or recovery drive into the Surface Pro’s USB port.
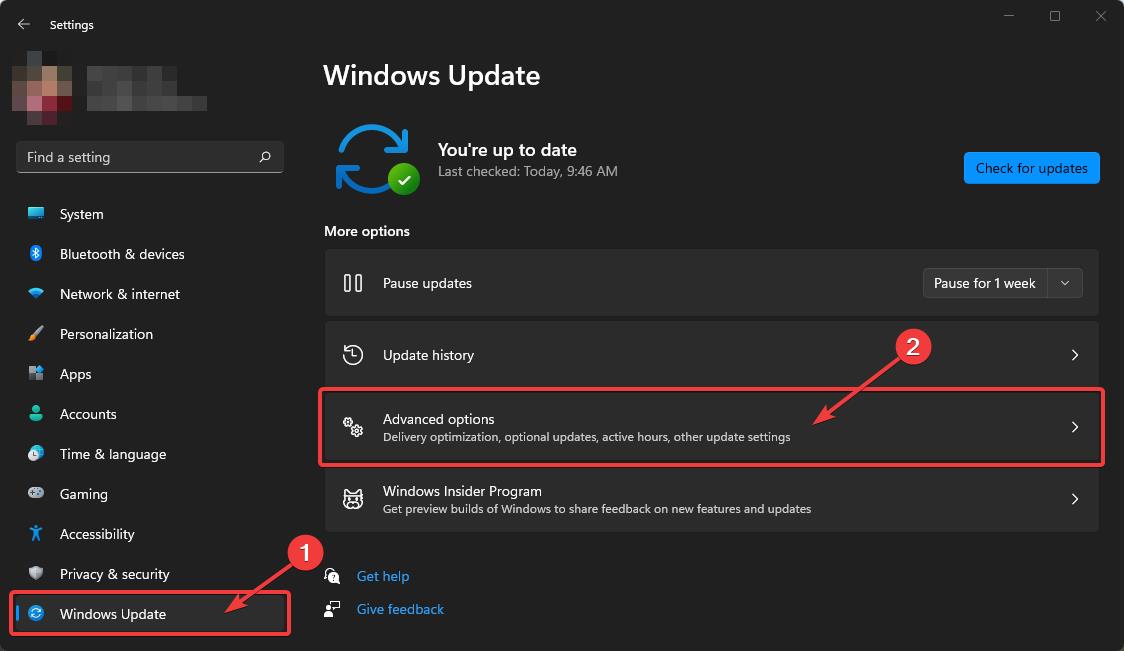
- Open Windows Settings
First, you need to access Windows Settings by going to Start and opening the Settings app with the gear icon (or by using Win + I shortcut key). - Go to Windows Updates > Advanced options.
On the left pane of the settings, select “Windows Updates“> “Advanced options” under the “More options” section.

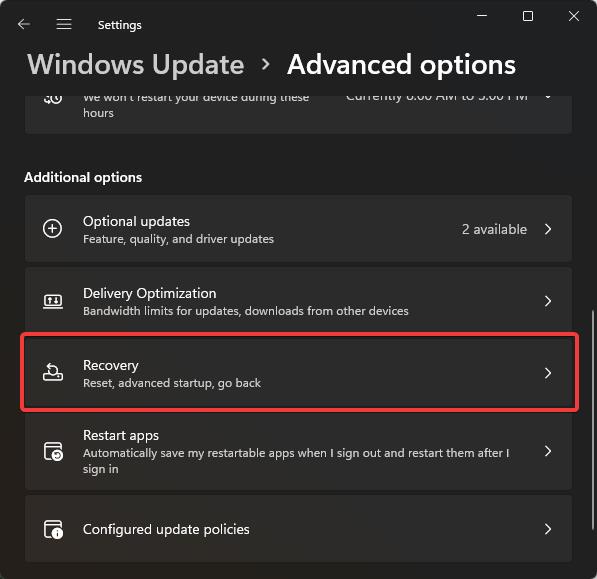
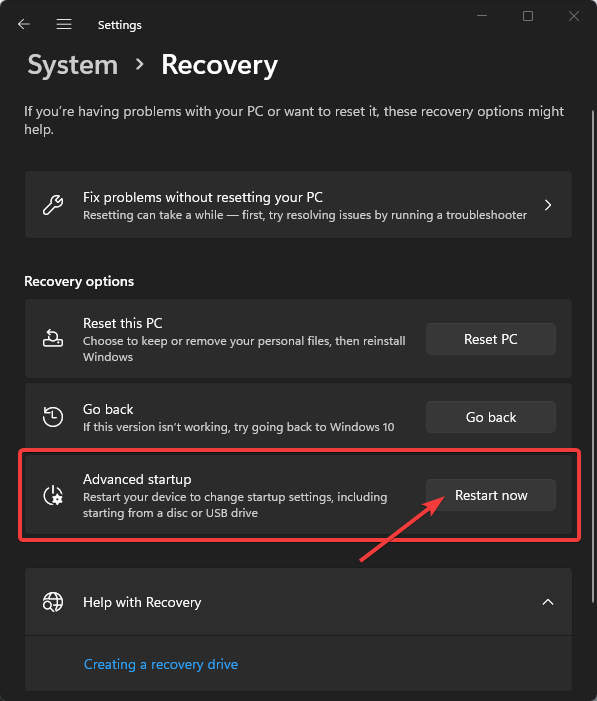
- Select the “Recovery” option
Under the “Additional options,” select “Recovery.”

- Restart your Surface Pro in “Advanced Startup” mode.
Under recovery options, click the “Restart now” button to restart your Surface Pro in advanced startup mode, allowing you to change startup settings.

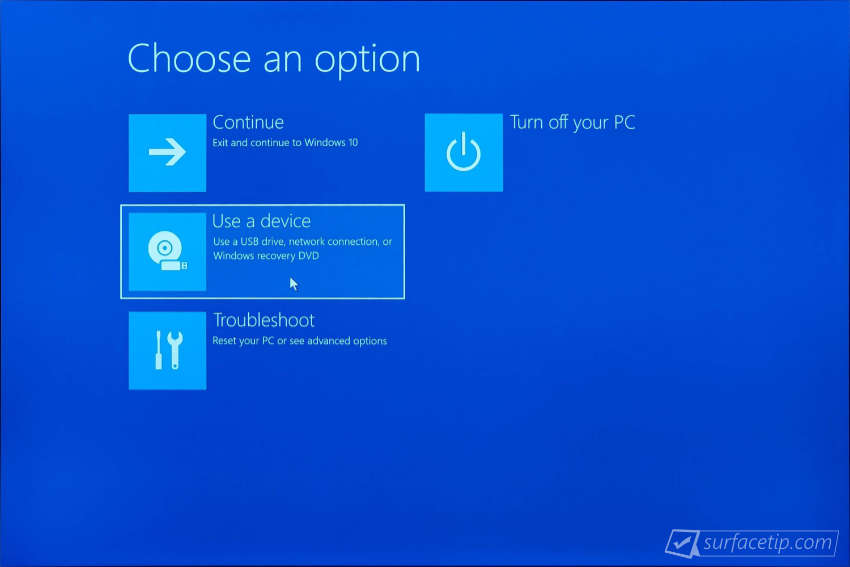
- Select “Use a device.”
After restarting your Surface Pro, you will see a blue screen with the following options. Select “Use a device.”

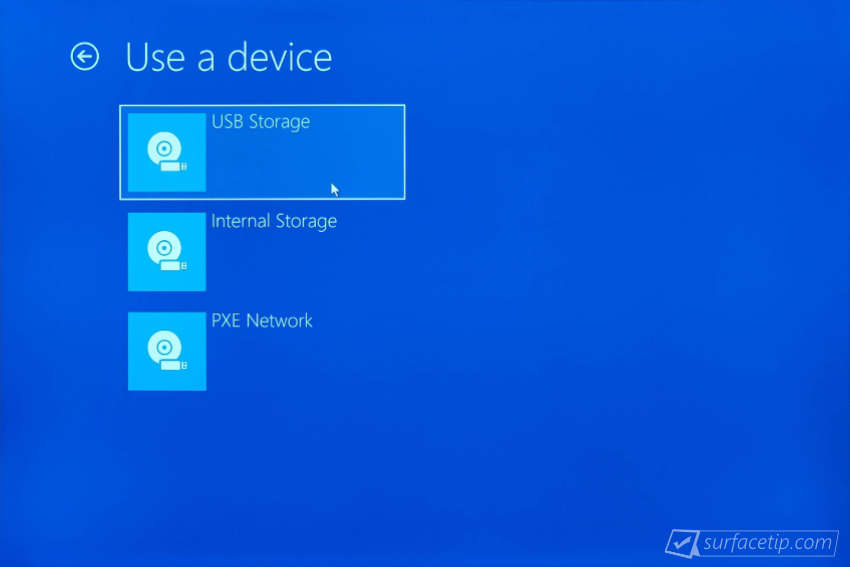
- Select “USB Storage”
It will list all possible ways to boot, including all connected storage devices. Select “USB Storage”.
Your Surface Pro will reboot with boot files from the inserted USB drive.
- Insert your bootable USB or recovery drive into the Surface Pro’s USB port.
- Open Windows Settings
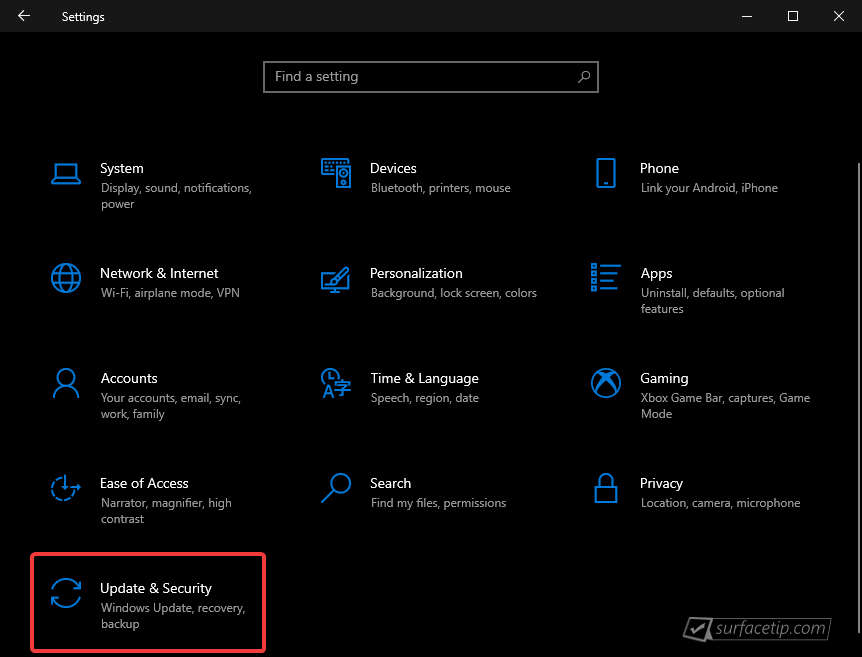
First, you need to access Windows Settings by going to Start and clicking the Gear icon (or by using Win + I shortcut key). - Go to Update & Security
In Windows Settings, select “Update & Security“.

- Go to Recovery
On the left side of the settings, select Recovery.
- Restart your Surface in Advanced Startup
Under the “Advanced startup” section, click “Restart now” to restart your Surface in an advanced startup mode.
- Select Use a device.
After restarting your Surface Pro, you will see a blue screen with the following options. Select Use a device.
- Select USB Storage
It will list all possible ways and connected storage devices. Select USB Storage.


Now, your Surface Pro will reboot with your connected USB drive.
Boot Surface Pro From A USB: When You Forgot Password
Users might often want to reset their Surface Pro when they forget the account password that prevents them from logging in. Here is how to do that on Surface Pro with or without a keyboard attached.
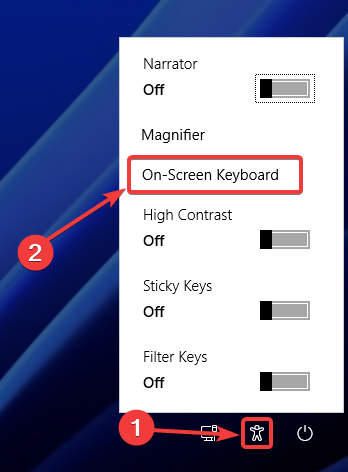
- Open On-Screen Keyboard (skip this if you have a keyboard attached)
On the Windows 11 login screen, Go to the Accessibility icon and stay right next to the power icon. Then select the “On-Screen Keyboard”.

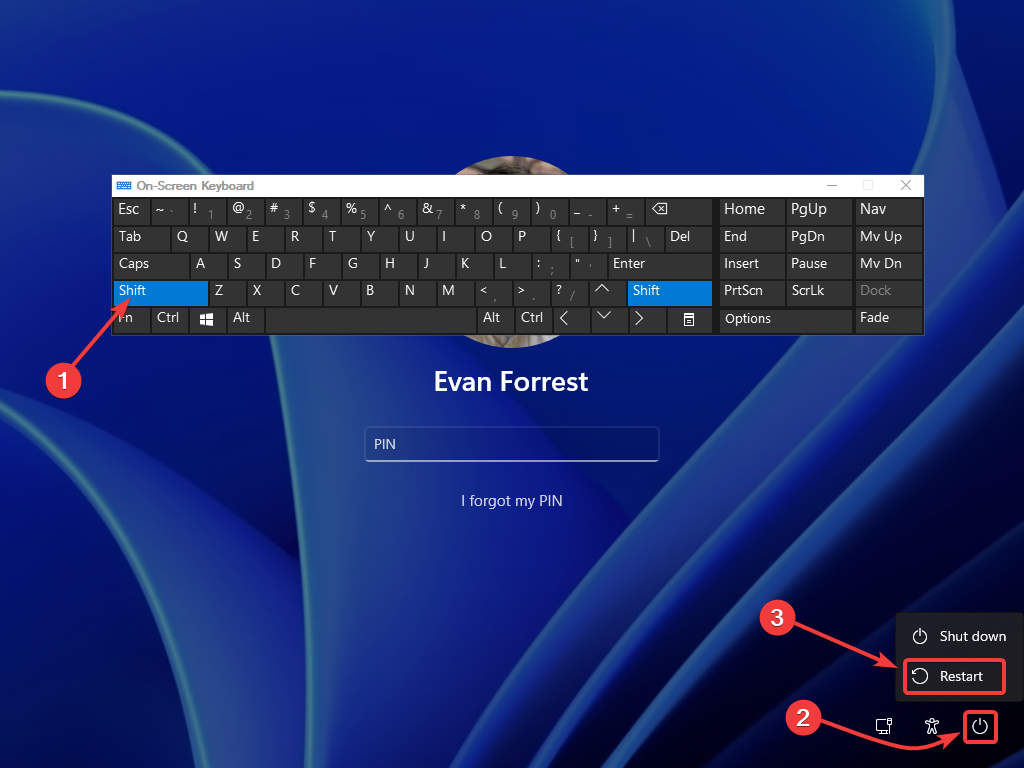
- Press and hold the Shift Key
On the Surface Type Cover, press and hold the Shift key (on the On-Screen Keyboard, click the shift key, and it will hold by itself). - Go to Power > Restart
On the right-bottom of the screen, click the power icon and select Restart. It will reboot your Surface Pro in Advanced startup mode.

- Select Use a device.
After restarting your Surface Pro, you will see a blue screen with the following options. Select Use a device.
- Select USB Storage
It will list all possible ways and connected storage devices. Select USB Storage.
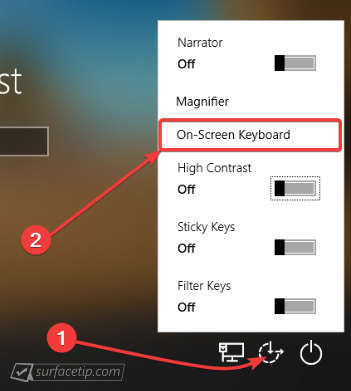
- Open On-Screen Keyboard (skip this if you have a keyboard attached)
On the Windows login screen, Go to the Ease of Access icon and stay right next to the power icon. Select On-Screen Keyboard.

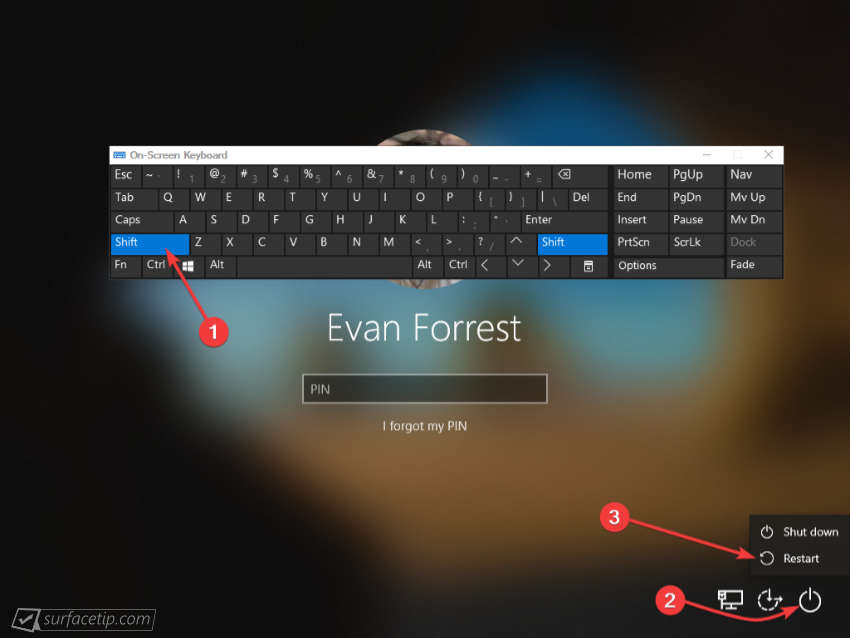
- Press and hold the Shift Key
On the Surface Type Cover, press and hold the Shift key (on the On-Screen Keyboard, click the Shift key, and it will hold by itself). - Go to Power > Restart
On the right-bottom of the screen, click the power icon and select Restart. It will reboot your Surface Pro in Advanced startup mode.

- Select Use a device.
After restarting your Surface Pro, you will see a blue screen with the following options. Select Use a device.
- Select USB Storage
It will list all possible ways and connected storage devices. Select USB Storage.


COMMENTS
Let us know what you think!
We appreciate hearing your thoughts, questions, and ideas about “How to Boot Surface Pro From a USB Drive”.
Hi Evan,
I used your instructions
Surface Pro Boot From A USB: With No Password
With your instructions I was able to reinstall Win 10, brilliant!
Kindest regards,
Owen Keogh
Hi Owen,
I’m glad to hear that 🙂 Thanks for reading!
My surface 8 Pro isn’t starting j have downloaded and created a recovery drive and I have followed the steps to boot and install from the recovery drive, its not working, the window logo just shows then goes off. Pressed the power button and the volume down released it, done the process countless times, still no response and the surface doesn’t have a USB port so I used a converter from type c that has a USB adapter
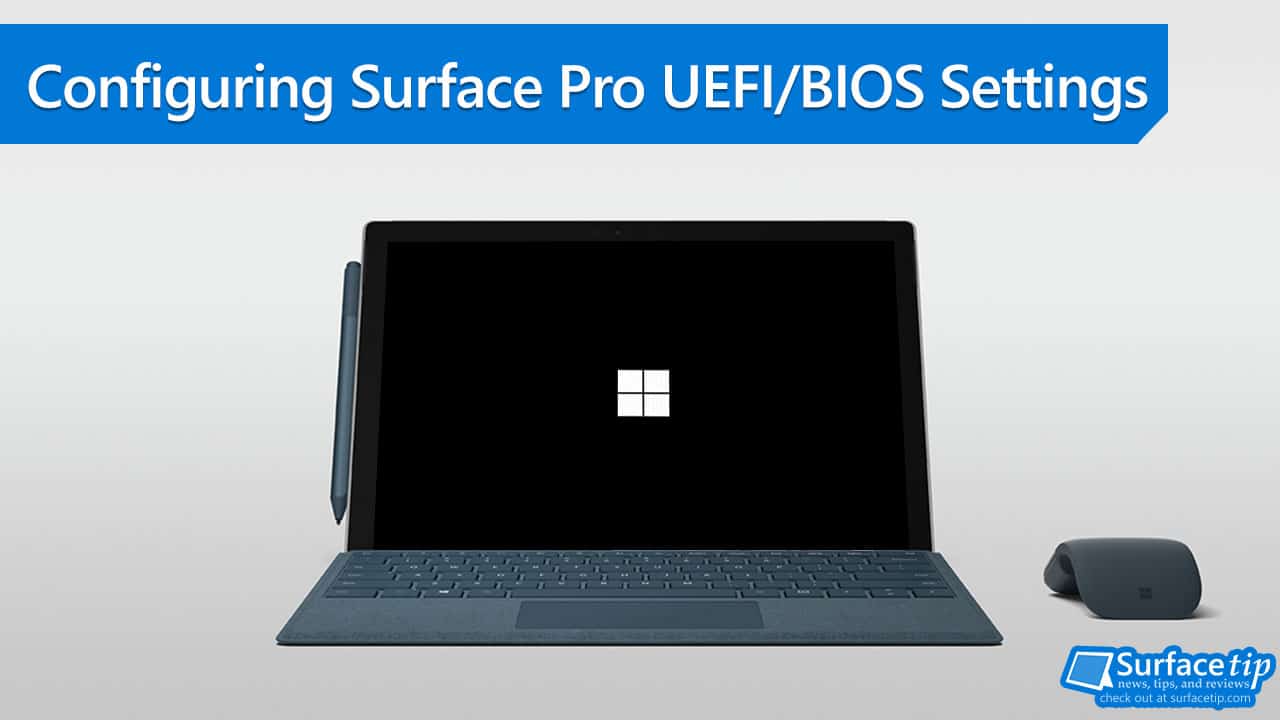
Did you manage to enter the UEFI setup on your Surface Pro 8? Check this article on how to configure UEFI settings. https://surfacetip.com/configuring-surface-pro-uefi-bios-settings/.
From the UEFI settings, you can go to “Boot Configurations” and try the following:
1. Click the trash icon to remove the Windows Boot Manager entry. It will recreate a new Boot Manager when restarting and might fix your boot loop.
2. Use your finger or mouse cursor to drag and drop the USB storage to the first of the list to force your Surface to boot first from the USB drive.
I am having same issue. I am not able to boot from the USB to run a fresh windows installation.
Kindly assist