Do you have any issues when you want to install Ubuntu or other Linux distributions on your Microsoft Surface devices? By default, Microsoft has blocked all third-party boot loaders from booting off your Surface devices.
To fix this, you will need to turn off the Secure Boot on your Surface so you can install a different operating system or do a clean Windows installation. This tutorial will teach you how to disable and re-enable Secure Boot on Surface Pro devices.
Table of Contents
What is Secure Boot?
Secure Boot is a new security feature available only on PCs with UEFI enabled to block the loading of uncertified bootloaders and drives. It helps to prevent your Surface from being loaded with unauthorized operating systems and malicious software applications. All Surface devices ship with Microsoft’s certificate in UEFI to verify boot loader integrity before launching.
Three Secure Boot options are available in the UEFI settings for Surface Pro 4, Surface Pro 5, Surface Pro 6, Surface Pro 7, and Surface Pro 7+.
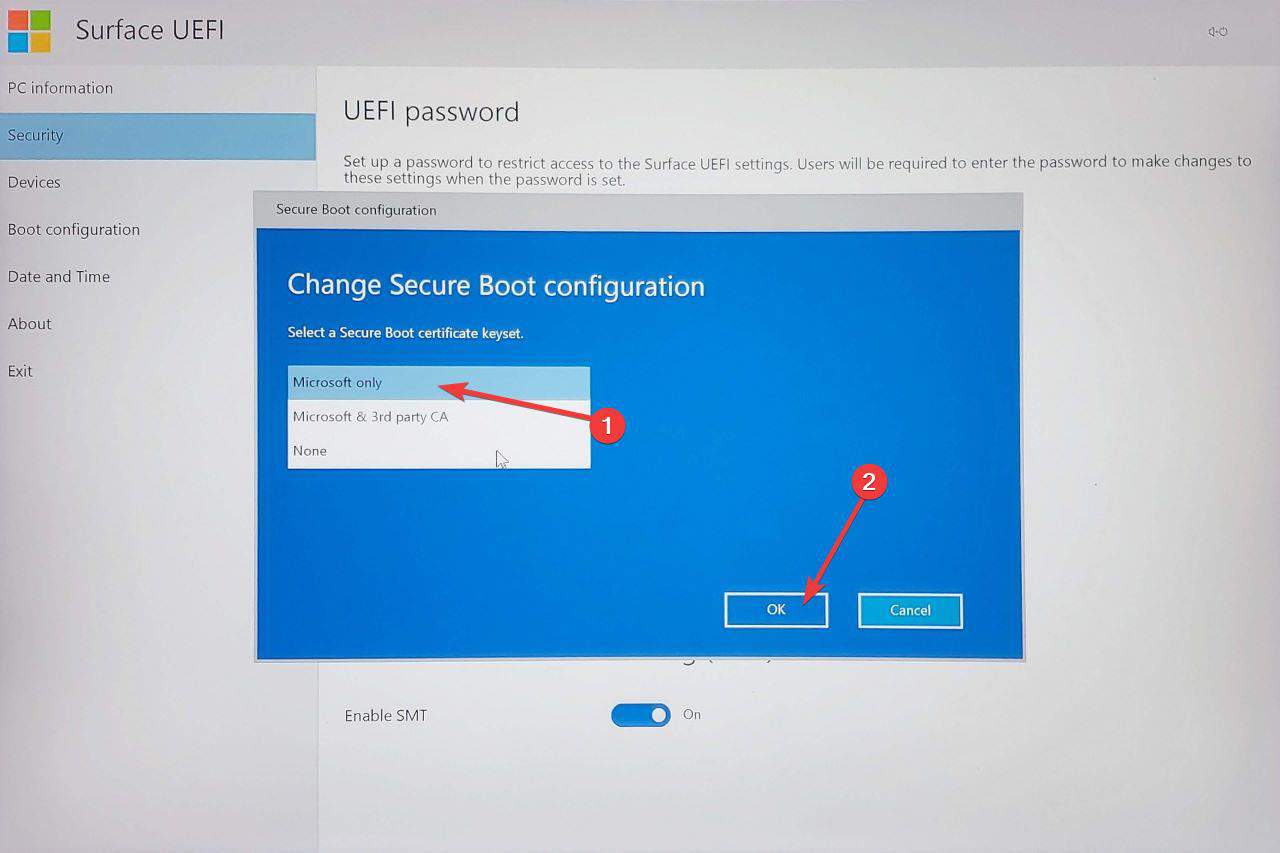
Secure Boot is configured by selecting a Secure Boot certificate keyset. There are three keysets to choose from on this PC.
- Microsoft only: Only boot software signed by Microsoft will execute on the PC.
- Microsoft & 3rd-party CA: Boot software, signed by Microsoft or the Microsoft Corporation UEFI CA 2011, will execute on the PC. Choose this option for compatibility with 3rd-party UEFI software and drivers.
- None: No keyset is installed, and Secure Boot is disabled. Any boot software will execute on the PC. This configuration is not recommended and should only be used by advanced users.
How to disable Secure Boot on Surface Pro
To disable the Secure Boot on Surface Pro:
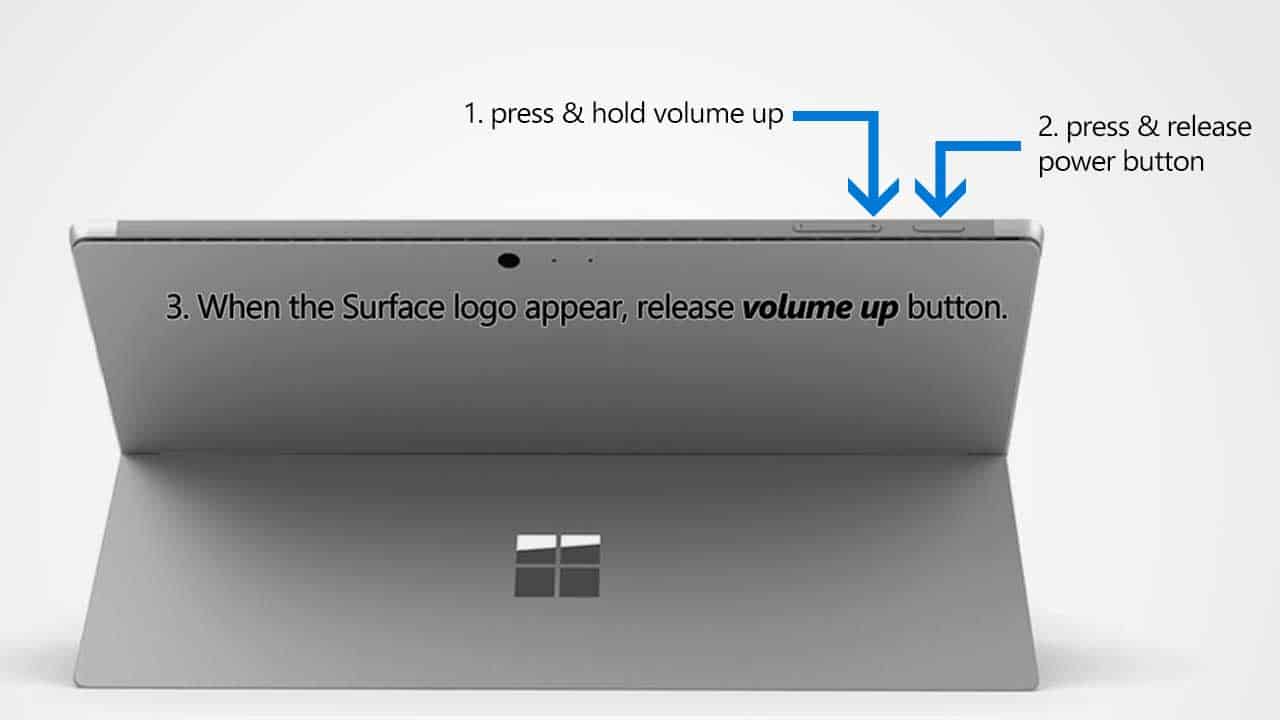
Shut down your Surface Pro.

Wait for a few seconds until the device turns off completely, then press and hold the Volume Up button on your Surface, then press and release the Power button.
When you see the Surface logo screen appear, release the Volume Up button. The Surface UEFI screen will appear in a few seconds.
Go to the Security page, under the Secure Boot section, and click Change Configuration.
You can notice that the current setting for Secure Boot is Enabled.
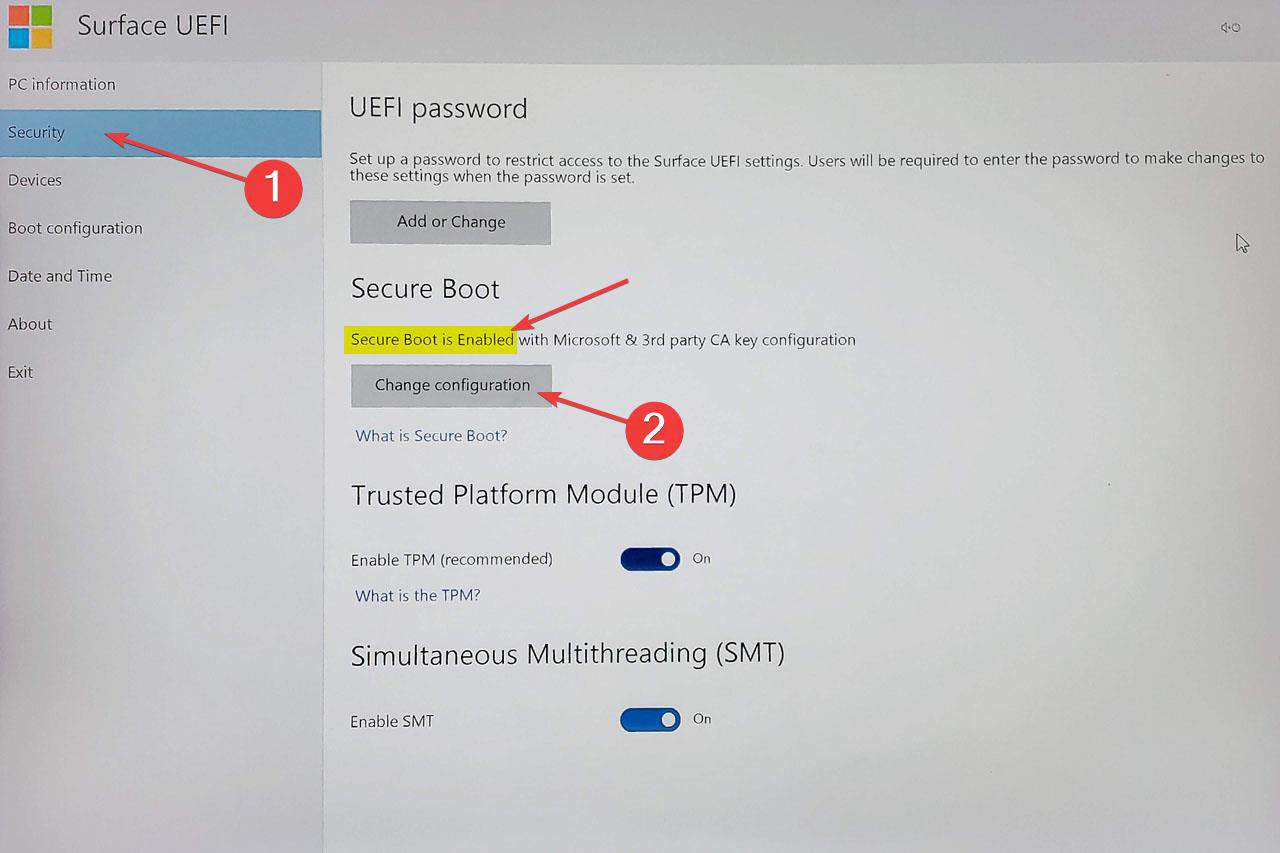
On the Change Secure Boot configuration dialog, change the option to None and click OK to apply the option.

Now, the current setting of Secure Boot will be changed to Disabled.
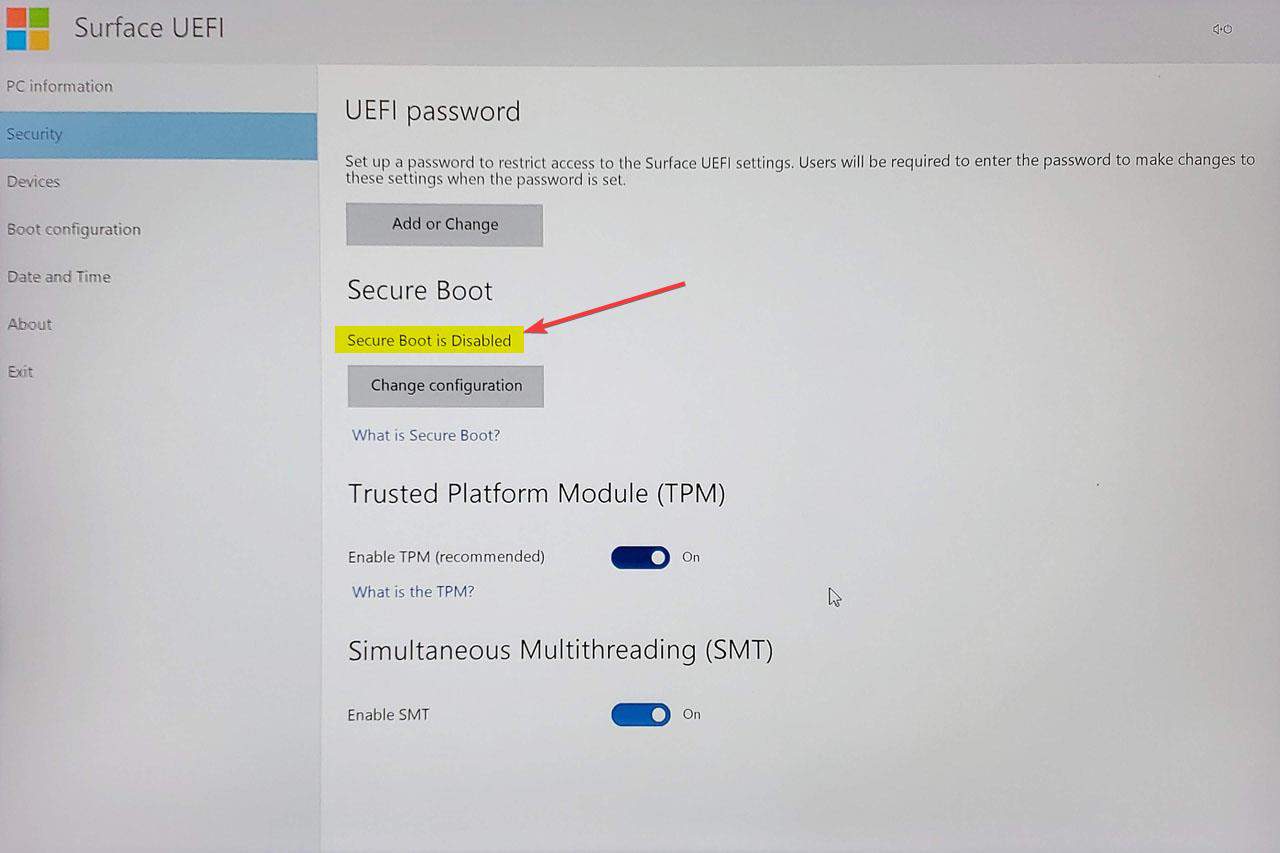
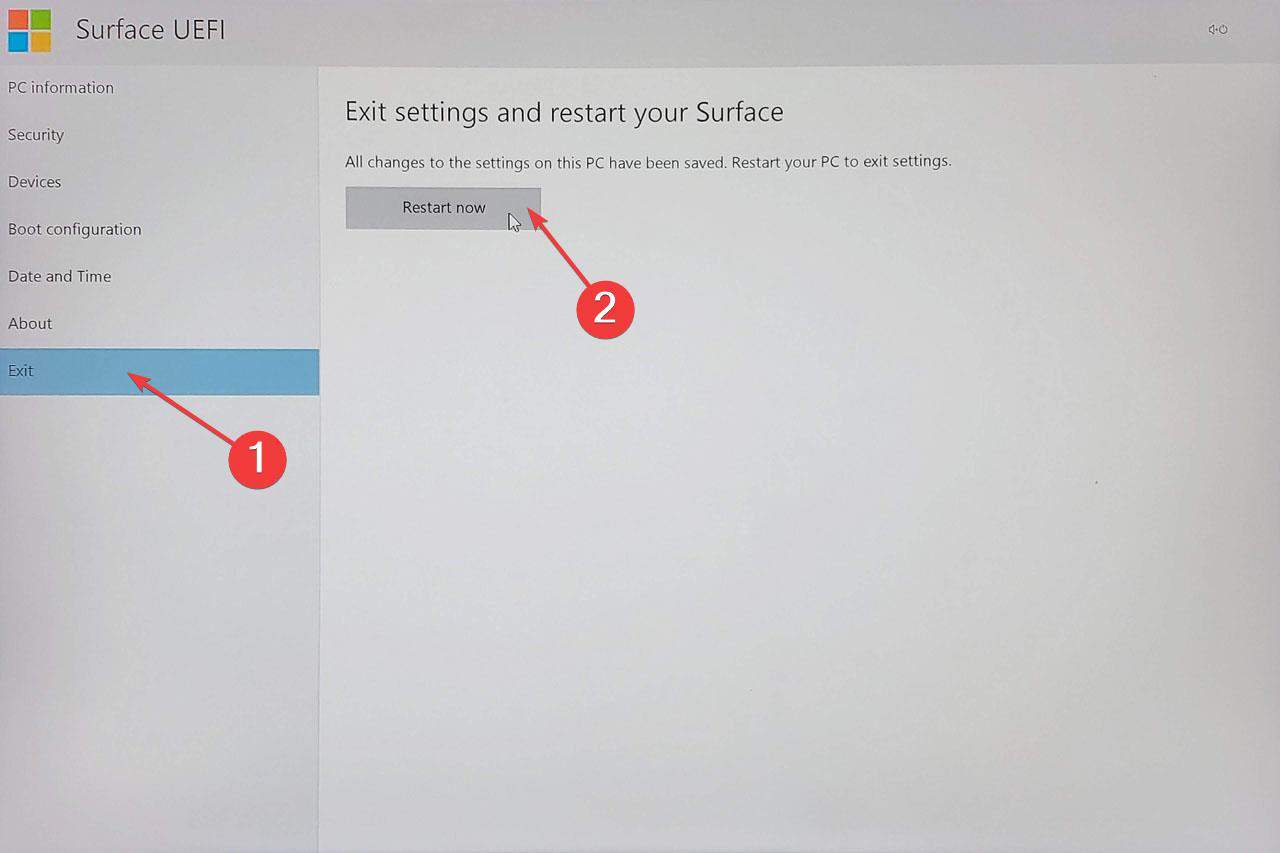
Now go to the Exit page, click Restart to save the settings, and restart your Surface.
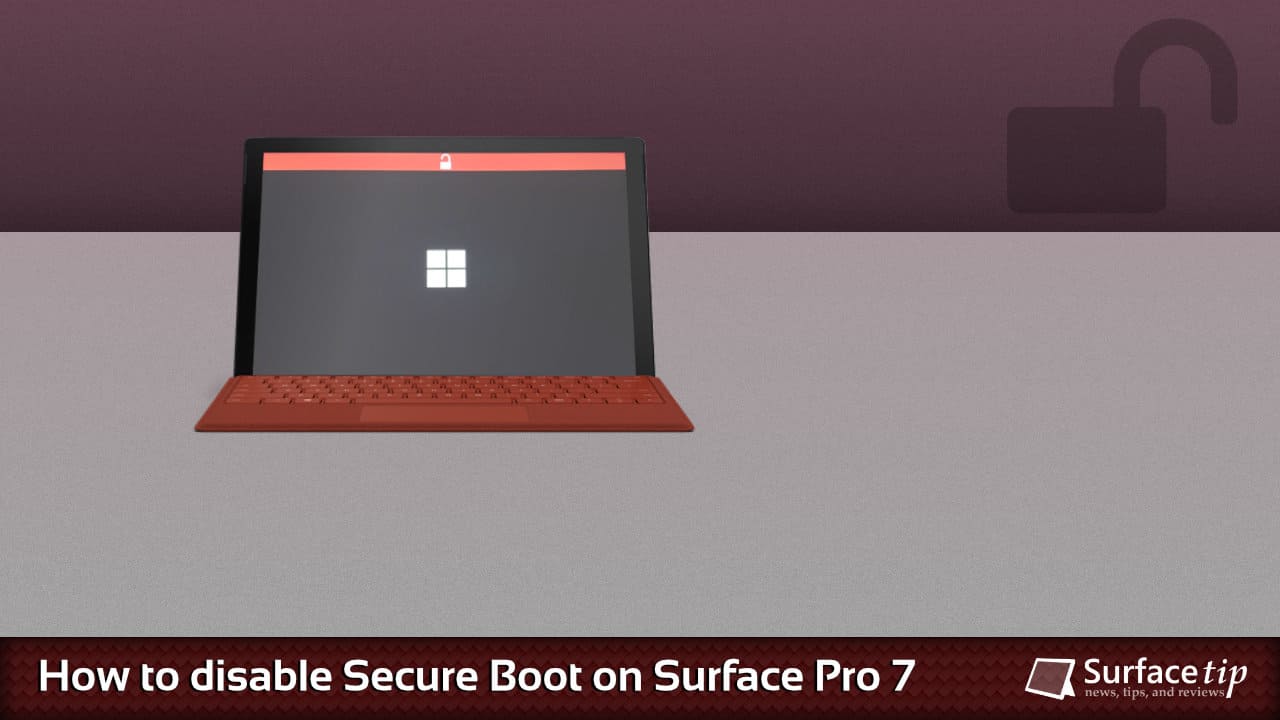
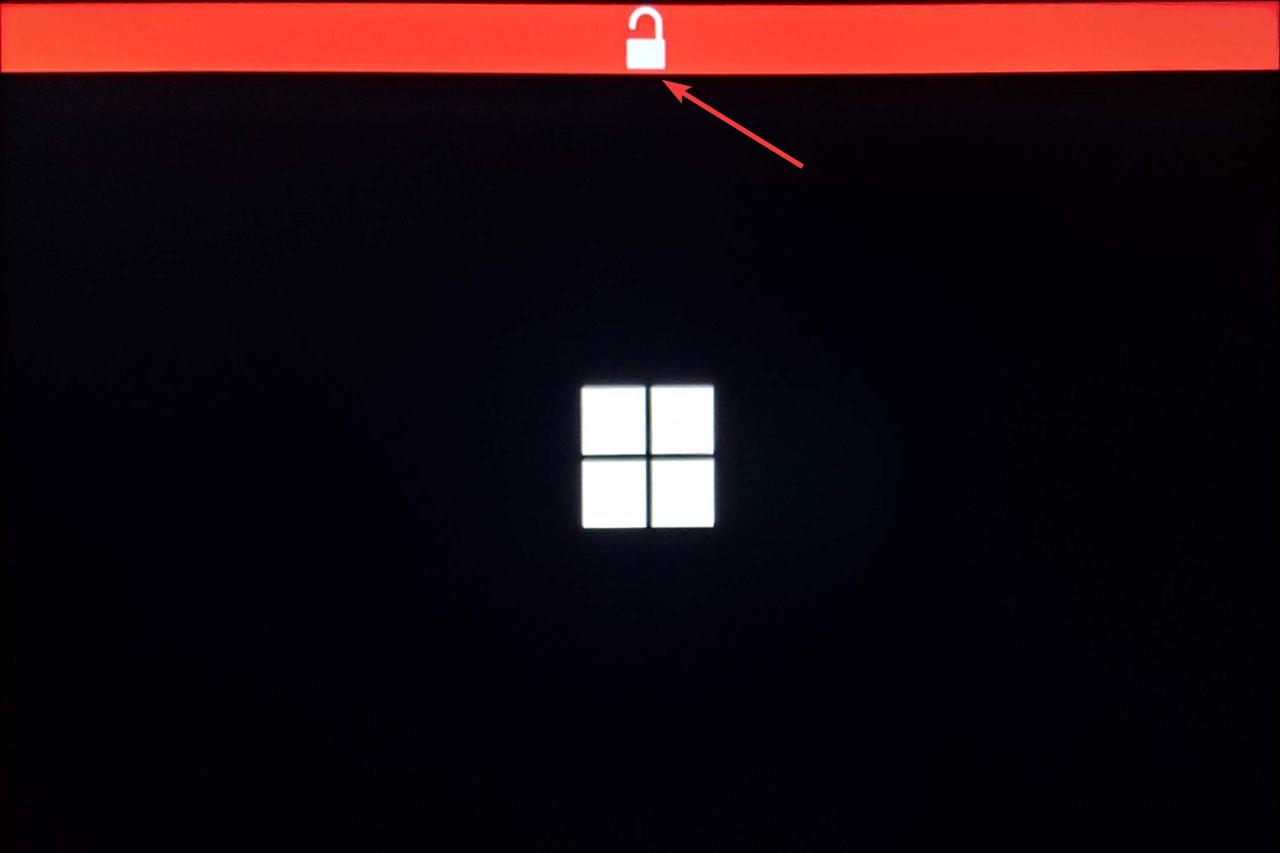
After rebooting, if you see a red bar with an unlock icon in the middle, it means the Secure Boot is successfully disabled.
How to re-enable Secure Boot on Surface Pro
When you finish your OS installation, re-enable the Secure Boot option to protect your Surface from malware and remove the red bar on your device’s boot screen when it starts. To do so:
Follow all the steps above to go to the Security page.
Select Microsoft only if your current OS is Windows 10 or 11, and click OK.
Go to the Exit page, click “Restart now” to save the settings, and restart your Surface.
For more information, check our article on configuring Surface Pro UEFI here.


COMMENTS
Let us know what you think!
We appreciate hearing your thoughts, questions, and ideas about “How to Disable Secure Boot on Surface Pro 4-7”.
Hello,
sorry for disturbing. I just read your post on how to deactivate secure boot and it’s very interesting.
I’m trying it on my surface Pro 7 but it won’t work.. 🙁
I have Windows 10 Home and am trying to install windows 10 Pro.
I correctly disabled the secure boot but the only thing it does is installing Windows 10 Home again and again.
Would you have any idea how this can be fixed so i can install Windows 10 Pro ?
Thanks a lot and regards
You might want to preface the instructions with a VERY important point: after toggling Secure Boot as you’ve described, the final reboot of your Surface will prompt you to enter your Bitlocker recovery key, and it’s not a key Microsoft Support can recover for you. You have to log in to your MS account to find the key, assuming it was backed up.
Btw, I appreciate your super helpful guide. Without it, you apparently can’t boot from a USB stick on the Surface to do things like running MemTest86. It was driving me mad until I found your guide to disable Secure Boot.