Microsoft makes Surface Laptop to deliver the perfect balance clamshell laptop with a sleek, lightweight, powerful, and excellent battery life. Surface Laptop 2, the second generation of Surface Laptop, features a new matte black color with 85 percent faster than the first generation.
Surface Laptop isn’t much different from most laptops on the market, so you can quickly learn how to use it as soon as you have it. However, if you can’t figure out how to take a screenshot on the Surface Laptop 2, you are in the right place. Surface Laptop 2 with Windows 10 installed, has many methods to take a screenshot. Here, we will introduce five ways to take screenshots on Surface Laptop 2.
Table of contents
- Method 1: Screenshot on Surface Laptop 2 with the keyboard
- Method 2: Screenshot on Surface Laptop 2 with Surface Pen
- Method 3: Screenshot on Surface Laptop with Windows Snipping Tool
- Method 4: Screenshot on Surface Laptop 2 with Snip & Sketch Tool
- Method 5: Screenshot on Surface Laptop 2 with Shortcut Keys
Method 1: Screenshot on Surface Laptop 2 with the keyboard
Unlike other Surface devices, the Surface Laptop always has a keyboard attached, so you can follow the traditional ways to take screenshots by using the dedicated PrtSn (Print Screen) key on the keyboard. To do so.
Option 1: Capturing all screens and storing them in the Windows Clipboard.
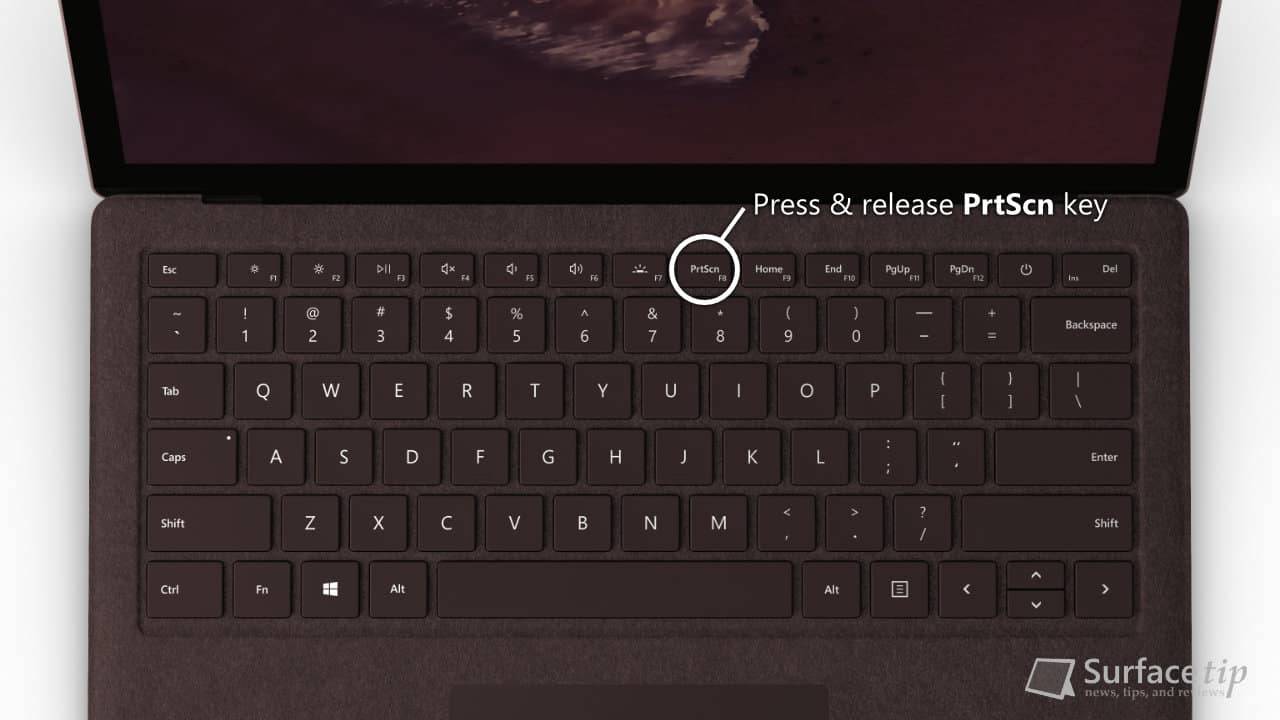
- Press the PrtSn key to take a screenshot.
- Paste to your preferred programs like Paint or Word.
Option 2: Capturing the active window and store it in the Windows Clipboard.
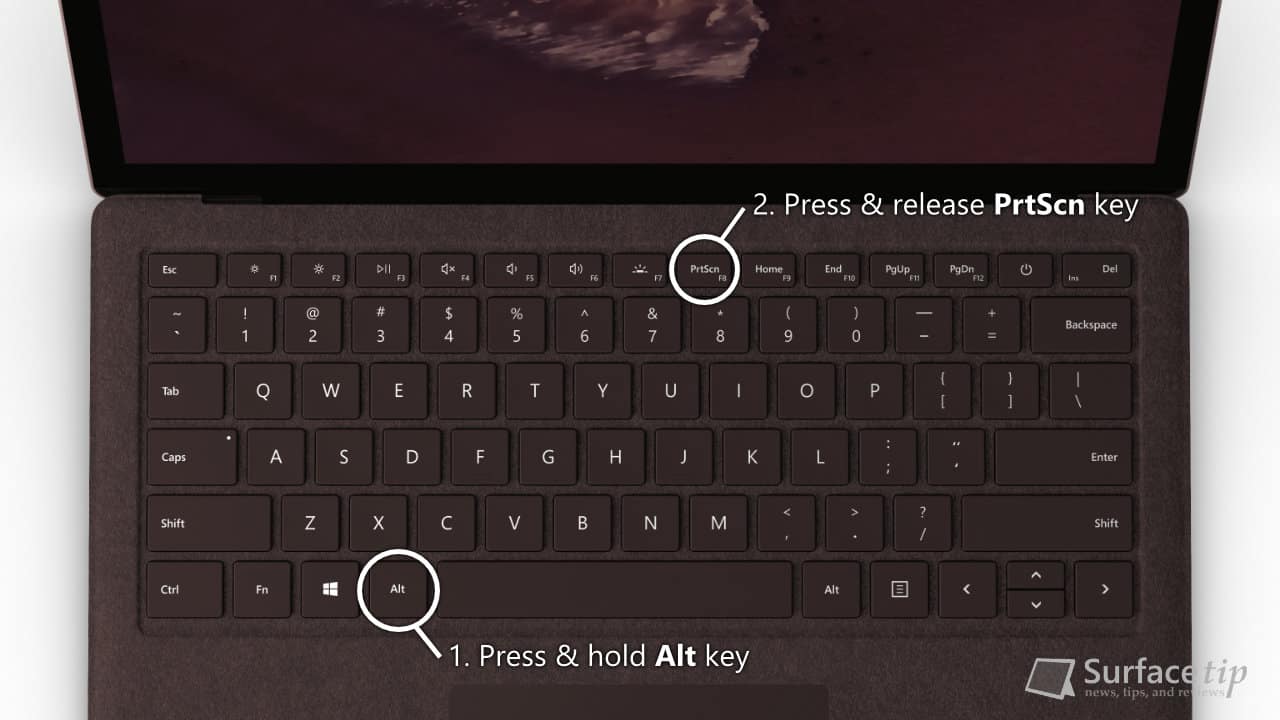
- Press the Alt + PrtSn key to screenshot the active window.
- Paste to your preferred programs like Paint or Word.
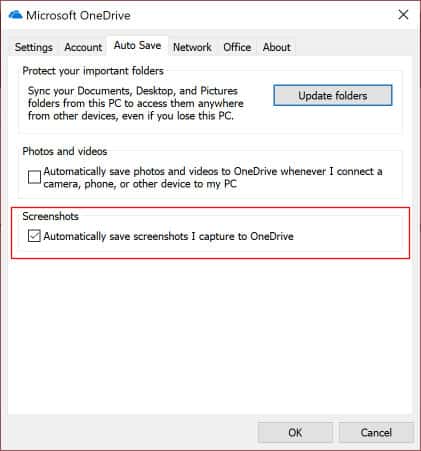
Here is how you can enable the automatically save screenshots option:
- On the taskbar, click the OneDrive icon > More > Settings.

- Go to Auto Save and enable the Automatically save screenshots I capture to OneDrive.


Method 2: Screenshot on Surface Laptop 2 with Surface Pen
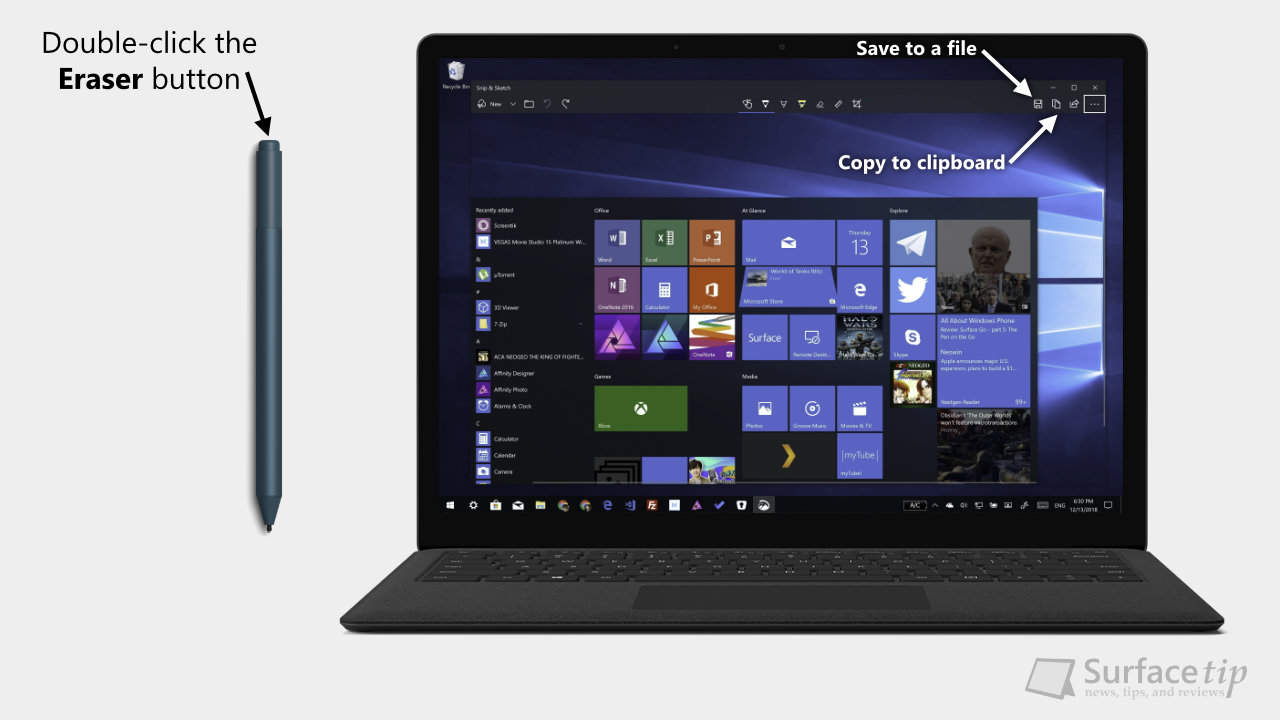
Surface Pen has been developed and is getting much better functions in Windows 10. The Windows 10 October update has a new feature called Snip & Sketch. This function will capture the device’s screen and pop up with tools for drawing, cropping, and others.
You can take a screenshot by using the Surface Pen with this function. To activate the screen sketch function
- Double-click the eraser button on the top of your Surface Pen.
- Now, you can edit, crop, and save the screenshot by clicking the “Save as” button on the top right of the screen.
Method 3: Screenshot on Surface Laptop with Windows Snipping Tool
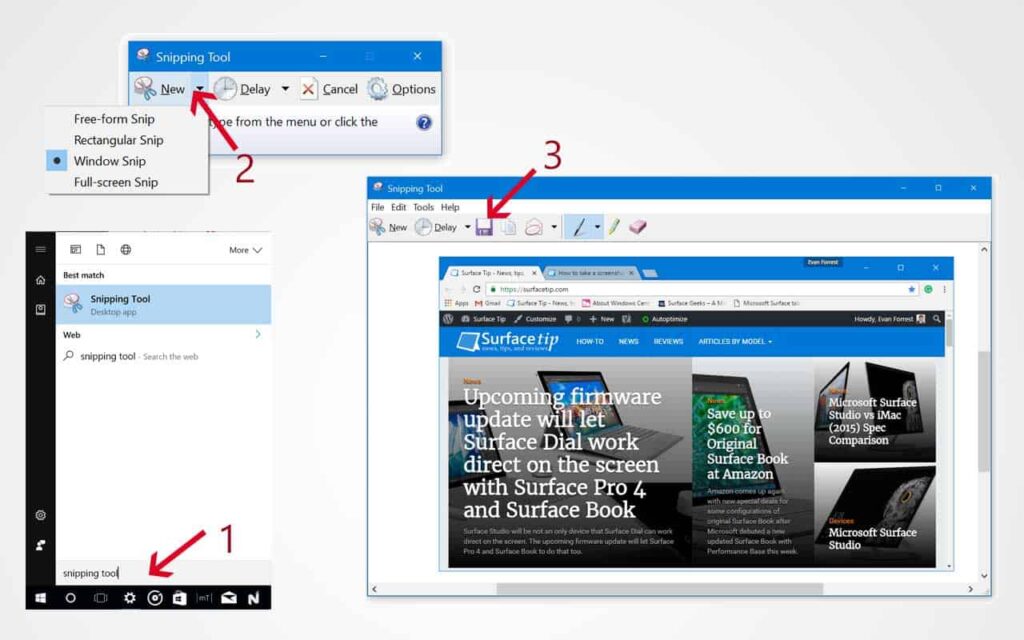
In Windows, a built-in screenshot program called Snipping tool has more controls and functionalities than the above methods. To open this tool:
- Open the Start menu and type “Snipping Tool” directly into the Cortana textbox.
- You can also open this tool by opening the Start menu and locating the Snipping Tool under the Windows Accessories folder.
When you launch the tool, you can take a screenshot in 4 ways: Full desktop, specific program windows, any size of rectangle shape, and any form you draw manually.
After you select an area you want to take a screenshot, it will display in a new window. You can draw or highlight the screenshots before saving them. This tool allows you to save the screenshot as a JPEG, PNG, GIF, or HTML file.
Method 4: Screenshot on Surface Laptop 2 with Snip & Sketch Tool
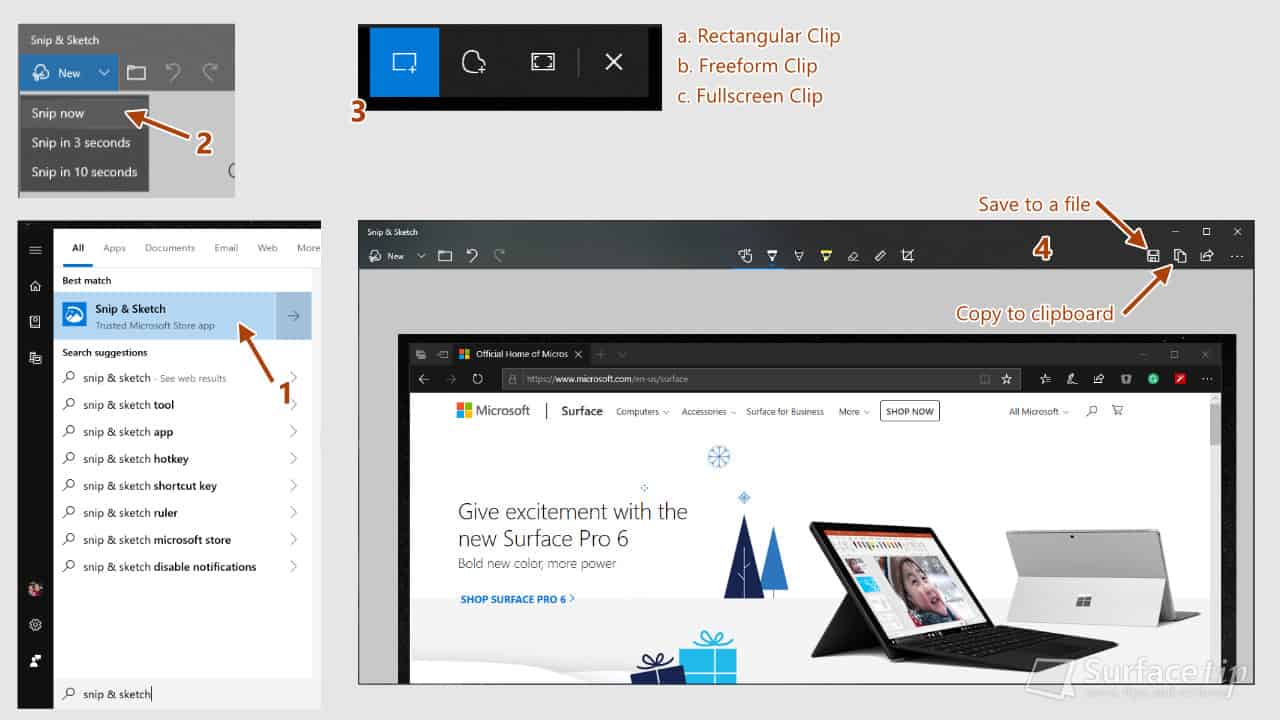
In recent Windows 10 Updates, Microsoft has introduced a new modern tool called Snip & Sketch that allows you to quickly annotate screenshots, photos, and other images with your pen, touch, or mouse and save, paste, or share with other apps. To take a screenshot with this tool:
- Open the Start menu and type “Snip & Sketch” directly into the Cortana textbox. You can also open this tool by opening the Start menu and locating the Snip & Sketch app.
- When the tool launches, click New and click Snip now.
- Select an area you want to capture.
- The captured image will appear in a new Snip & Sketch window. At this point, you can annotate, draw, or highlight whatever you want on the screenshot.
- Click the Save icon to save the screenshot to a file. Or click the Copy icon to copy the screenshot to the Windows clipboard so you can paste it elsewhere.
Method 5: Screenshot on Surface Laptop 2 with Shortcut Keys
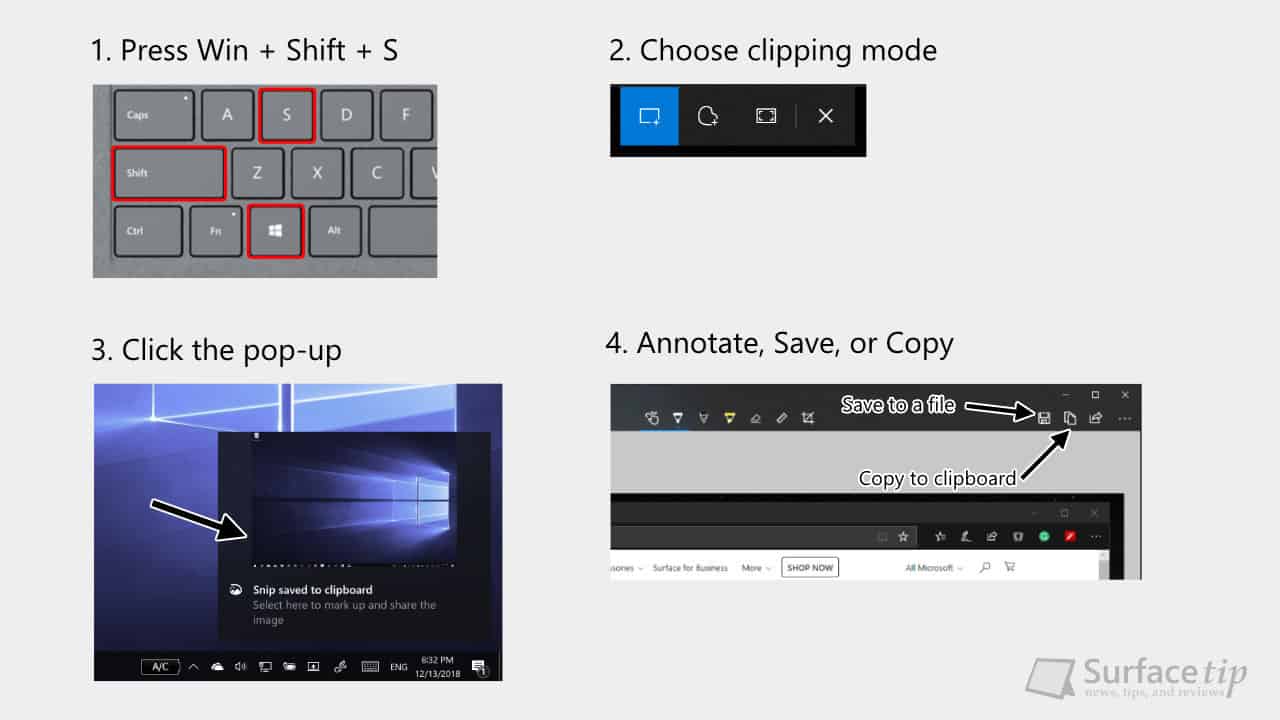
Another quicker way to activate the Snip & Sketch tool is by using Windows 10 shortcut keys. To do that:
- Press and hold the Windows key & Shift key on your keyboard, then press and release the S key.
- It will launch the Snip & Sketch tool with the screen clipping mode, so you can select and capture any area you want immediately.
- Now, you can annotate, draw, or highlight the screenshot within the tool.
- Click the Save icon to save the screenshot to a file. Or click the Copy icon to copy the screenshot to the Windows clipboard so you can paste it elsewhere.
Those are the five ways you can screenshot your Surface Laptop 2. What is your favorite one? Or do you have any other ways? Please share with us in the comment section below.

COMMENTS
Let us know what you think!
We appreciate hearing your thoughts, questions, and ideas about “How to screenshot on Surface Laptop”.
All i want to fo is print the screen a screen shot. This is sll so complicated!!!!