By Evan Forrest (SurfaceTip)
Since the first generation of Microsoft Surface Pro (2013) and Surface 3, Microsoft has implemented custom BIOS firmware on those devices to support required hardware features and securities.
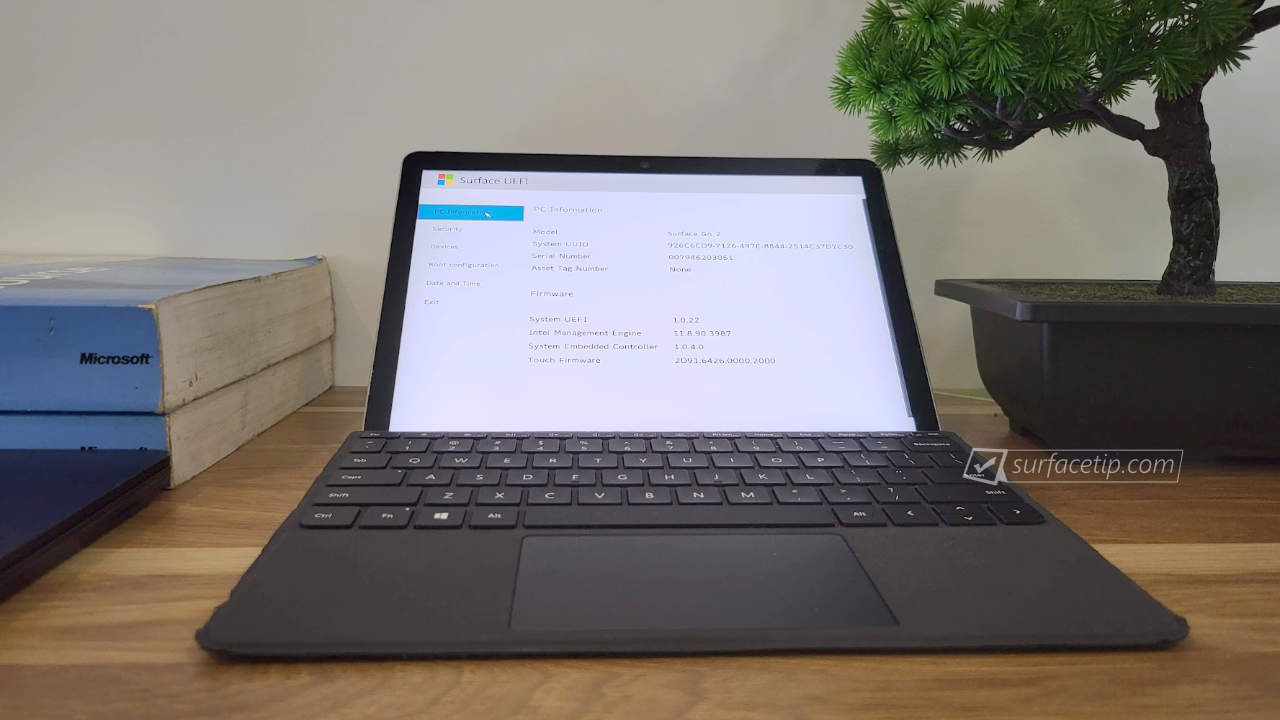
Starting with Surface Pro 4, Microsoft has created its own UEFI firmware for use with newer devices. This new firmware is called Surface UEFI, which is currently used on newer devices, including Surface Go, Surface Book, and Surface Studio.
Surface Go has a slightly new design interface compared to other Surface models, including a different on-screen keyboard. This article will walk you through how to access and configure the Surface Go UEFI settings.
Table of Contents
- How do you access Surface Go UEFI settings?
- Save changes and restart your Surface
- Restart your Surface without saving your changes.
- How do you check your Surface Go device information via UEFI settings?
- How do you change the system boot order on Surface Go?
- How do you manage device components on Surface Go UEFI Settings?
- How do you change your Surface Go date and time via Surface UEFI?
- How do you protect UEFI settings with a password on Surface Go?
- What is the Trusted Platform Module (TPM)?
- What is Secure Boot Control?
- Other Surface’s UEFI Settings
- More Surface Go Resources
How do you access Surface Go UEFI settings?
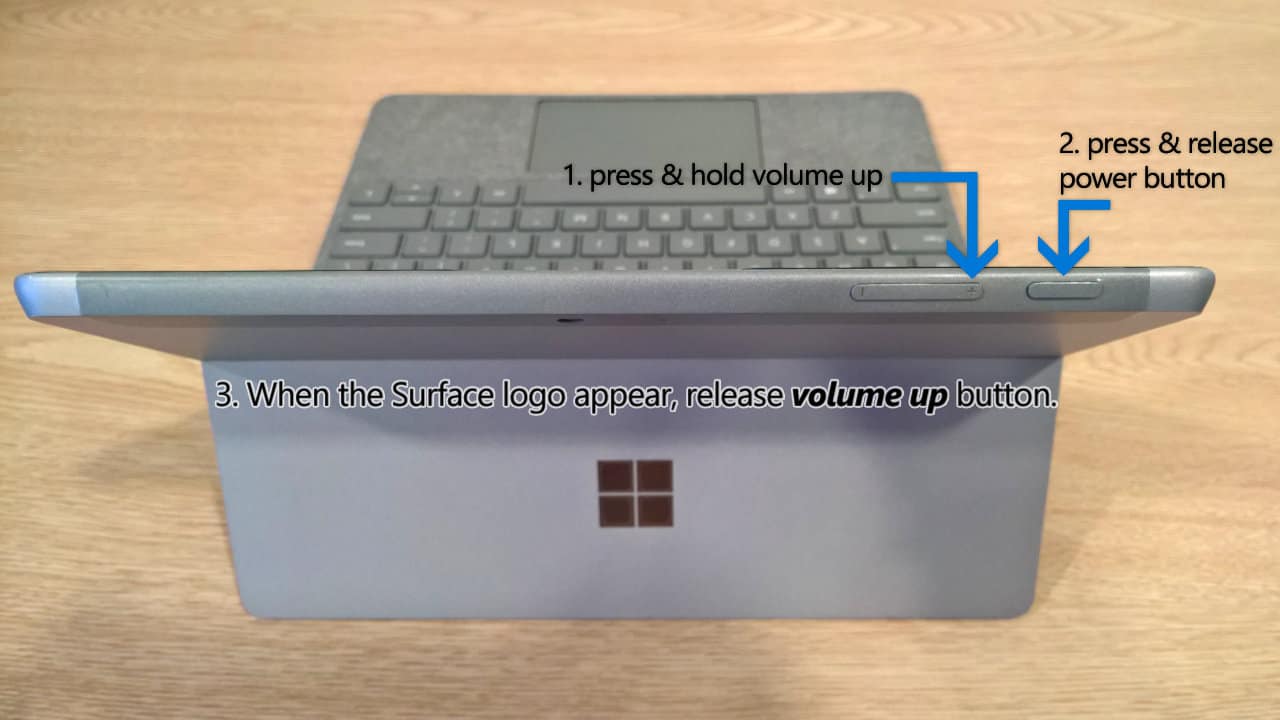
You can only enter the Surface Go UEFI setup screen while your Surface is starting. Here is how you do that:
- Shut down your Surface.
- Press and hold the Volume Up button on your Surface, then press and release the Power button.
- When you see the Surface logo screen appear, release the Volume Up button. The UEFI settings menu will appear in a few seconds.

After you have made any changes to the UEFI settings, you can save or delete those changes by:
Save changes and restart your Surface
By default, every change you make will automatically be saved. When you restart your Surface, all settings will take effect. To do so.
- In the UEFI settings menu, select Exit.
- Click Restart Now.

- It will save all the settings you have changed and restart your Surface.

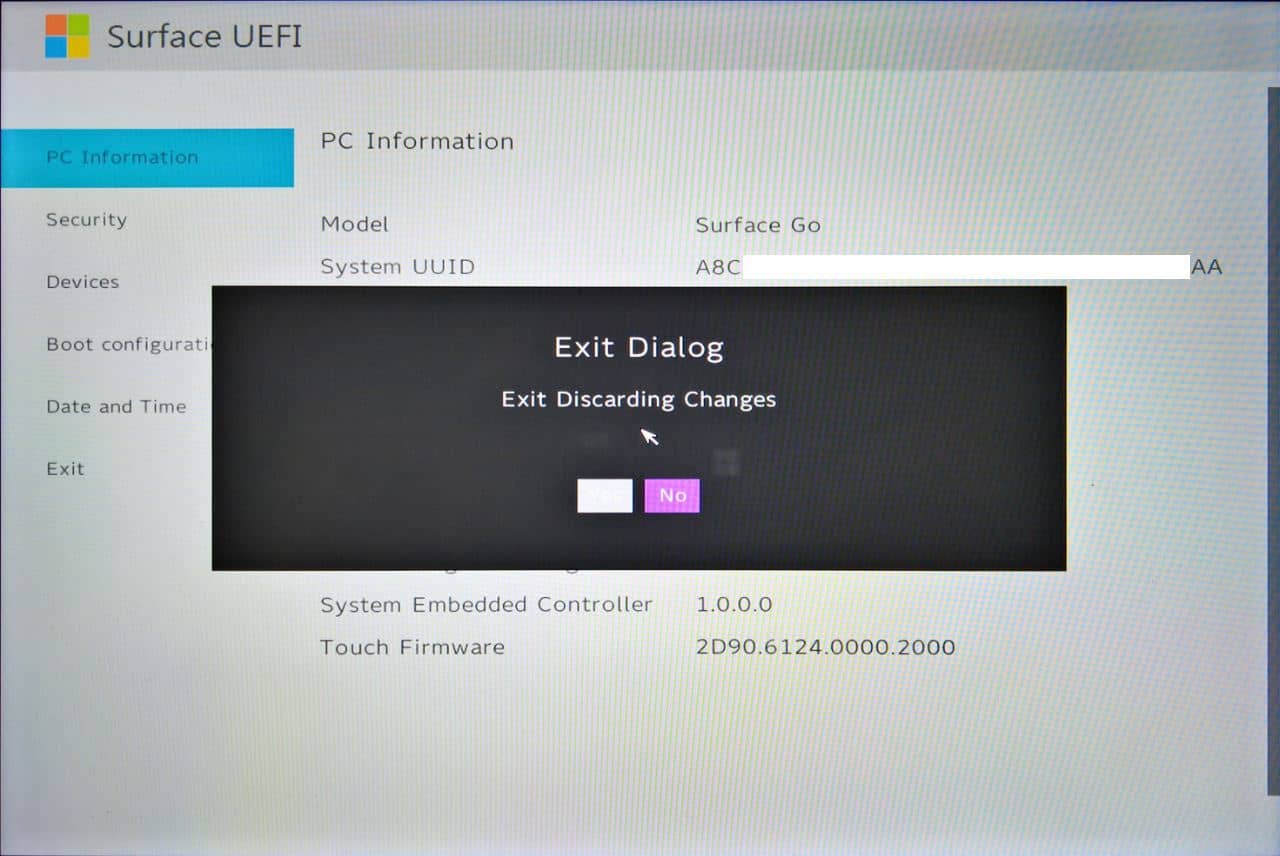
Restart your Surface without saving your changes.
You also have the option to discard all changes as well by using your Surface Type Cover or external keyboard. To do so.
- On the keyboard, press the ESC key.

- Now you have two options:
- Yes – Delete your changes and restart your Surface.
- No – turn back to the UEFI settings.
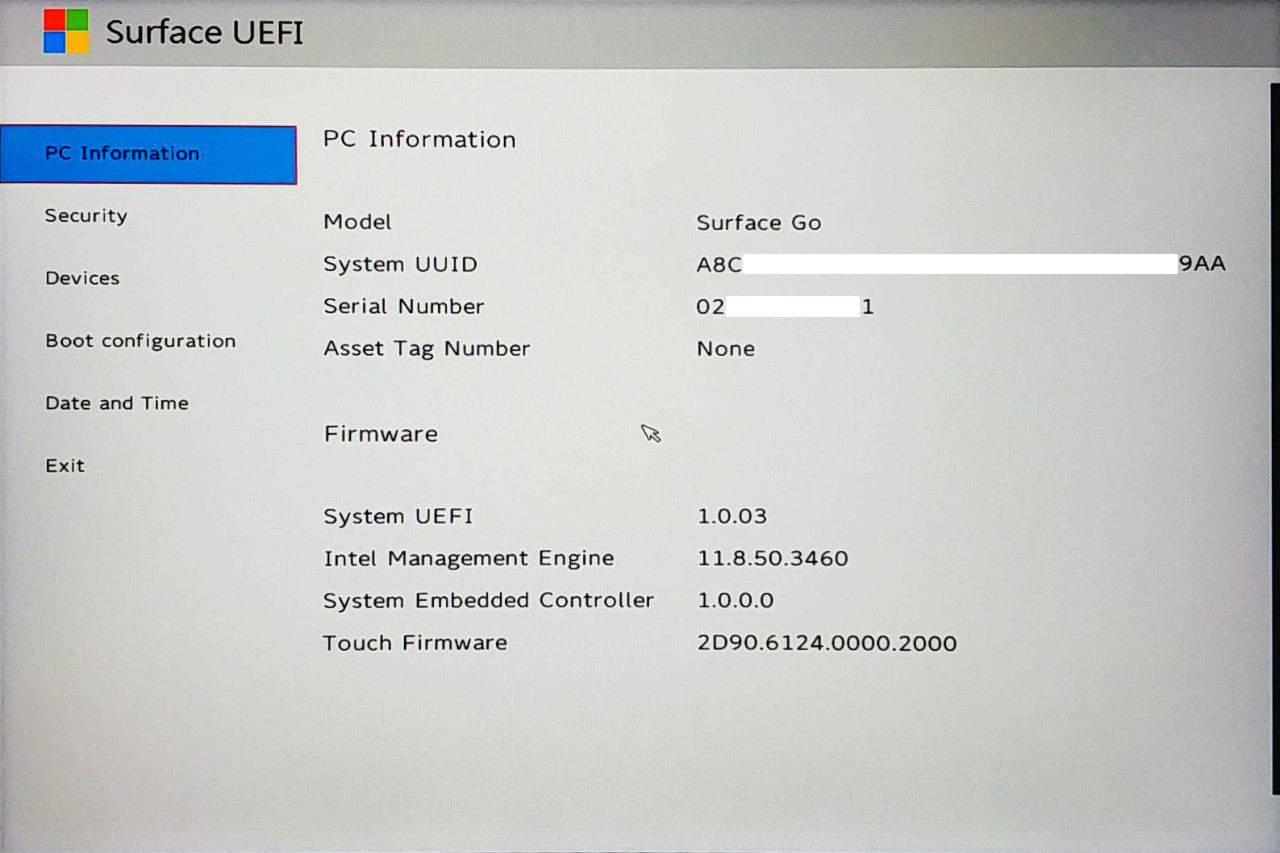
How do you check your Surface Go device information via UEFI settings?
The PC information page is the first displayed page when you enter UEFI settings. You can find more information about your device identities on the page, such as Model, System UUID (Universally Unique Identifier), Serial Number, and Asset Tag. Moreover, it also displays all important system component versions you might need for troubleshooting.
- Enter Surface UEFI settings as per the instructions above.
- In the UEFI settings menu, select PC Information, and you will see the following information:

See also: How to manage asset tag on Surface Go.
How do you change the system boot order on Surface Go?
To change the alternate system boot order on your Surface Go:
- Enter Surface UEFI settings as per the instructions above.
- In the Surface UEFI menu, go to the Boot Configuration page as below:

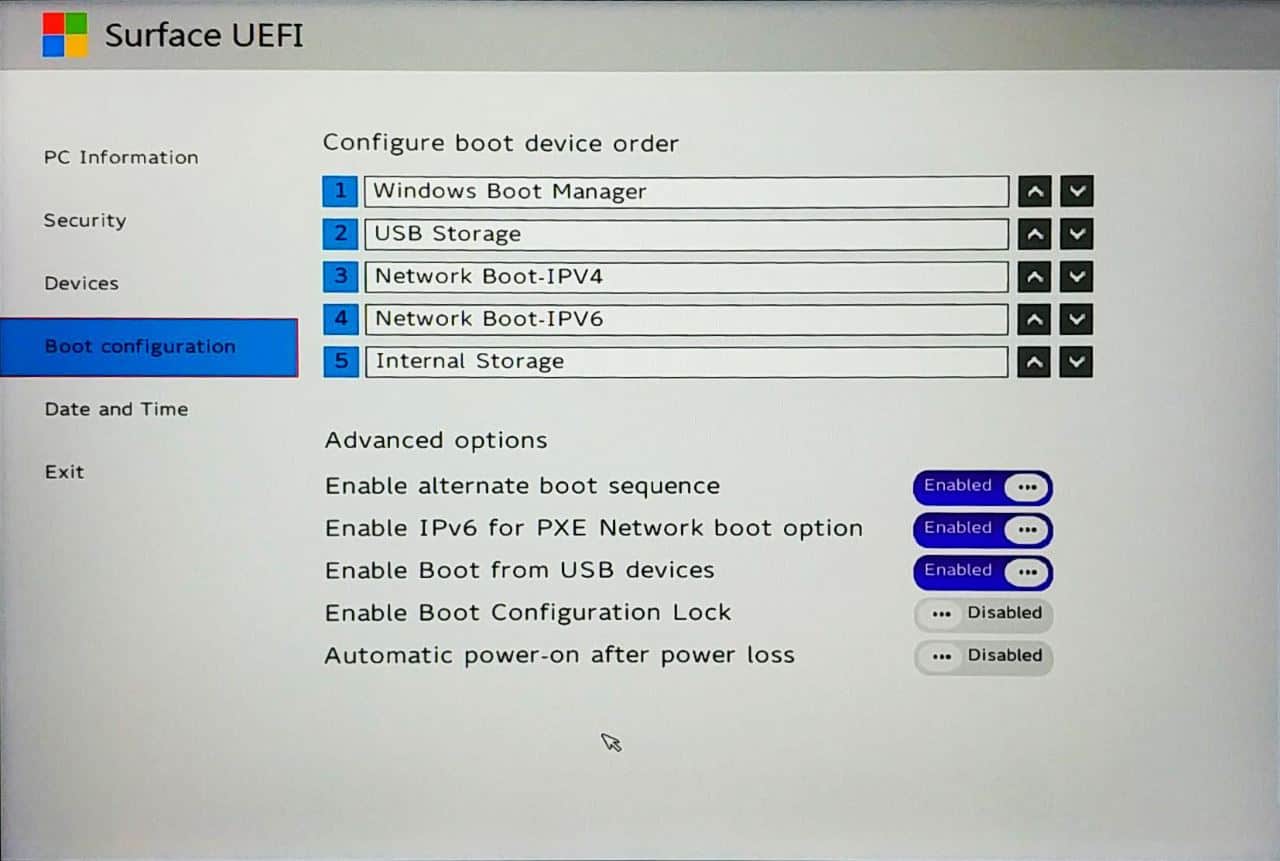
On the “Configure boot device order” page, you can:
- Rearrange the boot order by clicking the up/down arrow button on any available boot option.
How do you manage device components on Surface Go UEFI Settings?
Surface Go allows you to deactivate some of your surface device components and features to meet your specific security requirements. You can turn those components on or off by:
- Enter Surface UEFI settings as per the instructions above.
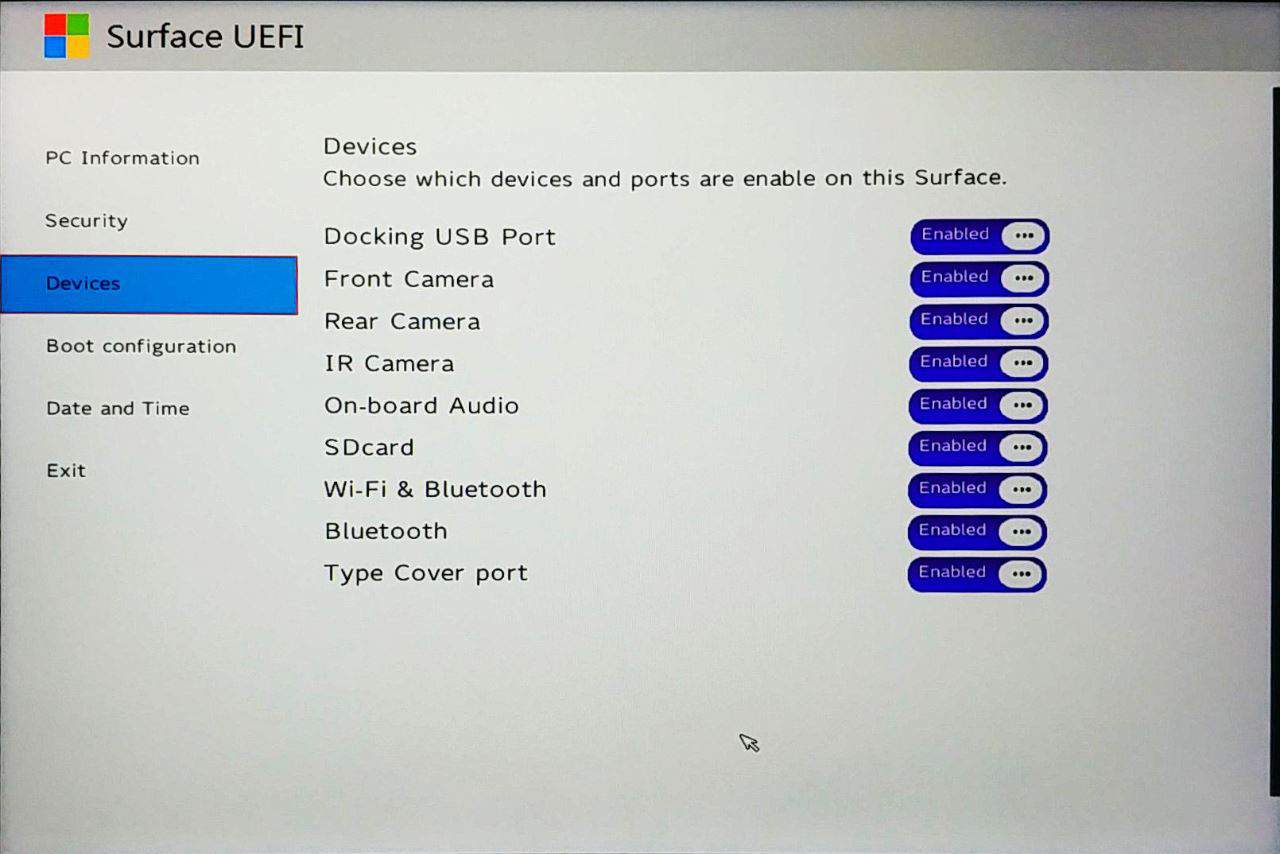
- In the UEFI settings menu, select Security, and you will see the following options:

- On our Surface Go with System UEFI version 1.0.0.3, there are the following device options:
- Docking USB Port – enable/disable the ability to use USB ports on the connected dock.
- Front Camera – enable/disable the front-facing camera.
- Rear Camera – turn the primary rear camera on/off.
- IR Camera – enable/disable the Infrared camera used for the Windows Hello feature.
- On-board Audio – turn internal audio or speakers on/off.
- SDcard – turn the microSD slot on/off.
- Wi-Fi & Bluetooth– turn both Wi-Fi and Bluetooth on/off.
- Bluetooth – turn the internal Bluetooth on/off only.
- Type Cover port – turn on/off the Surface Go type cover.
How do you change your Surface Go date and time via Surface UEFI?
The new Surface UEFI now allows you to set your Surface Go’s date and time on the UEFI settings page. To check or set a date and time for your Surface Go:
- Enter Surface UEFI settings as per the instructions above.
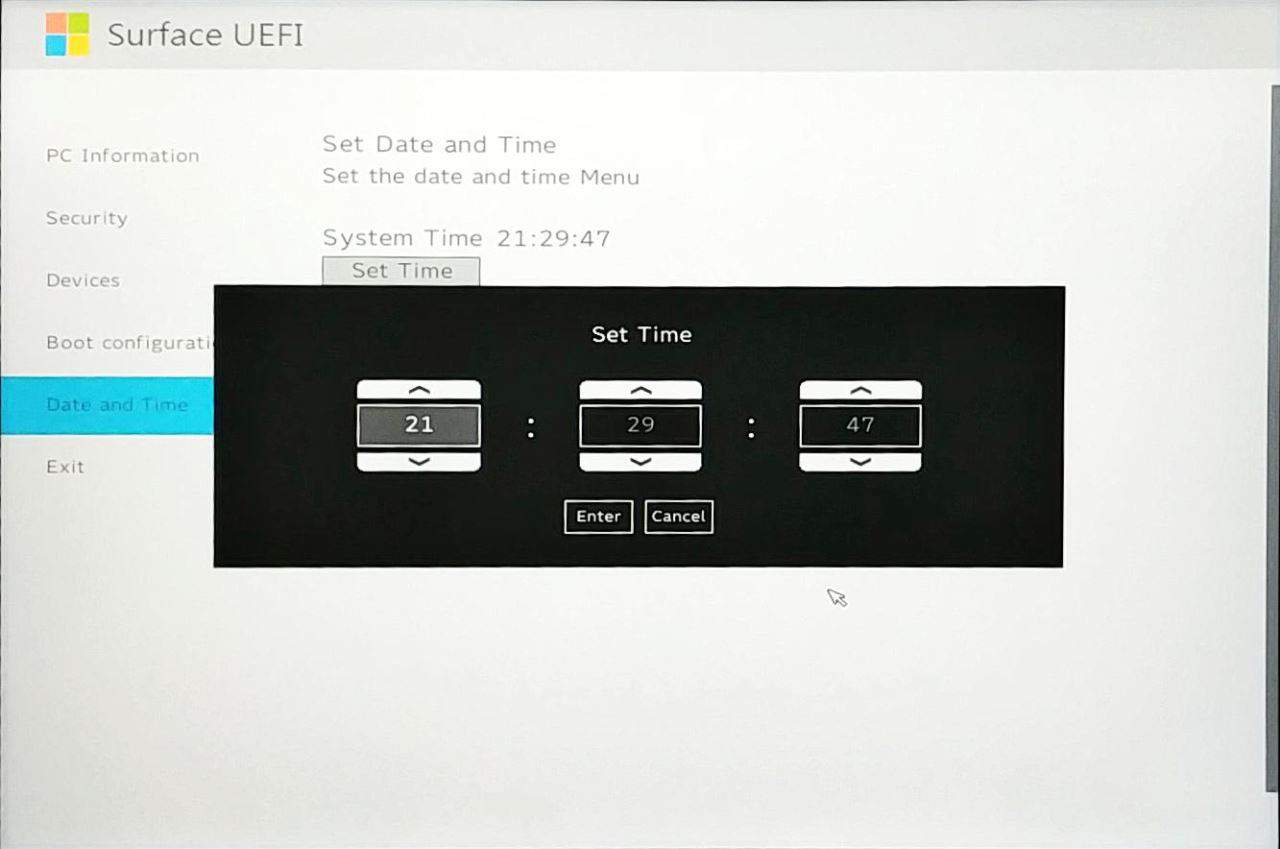
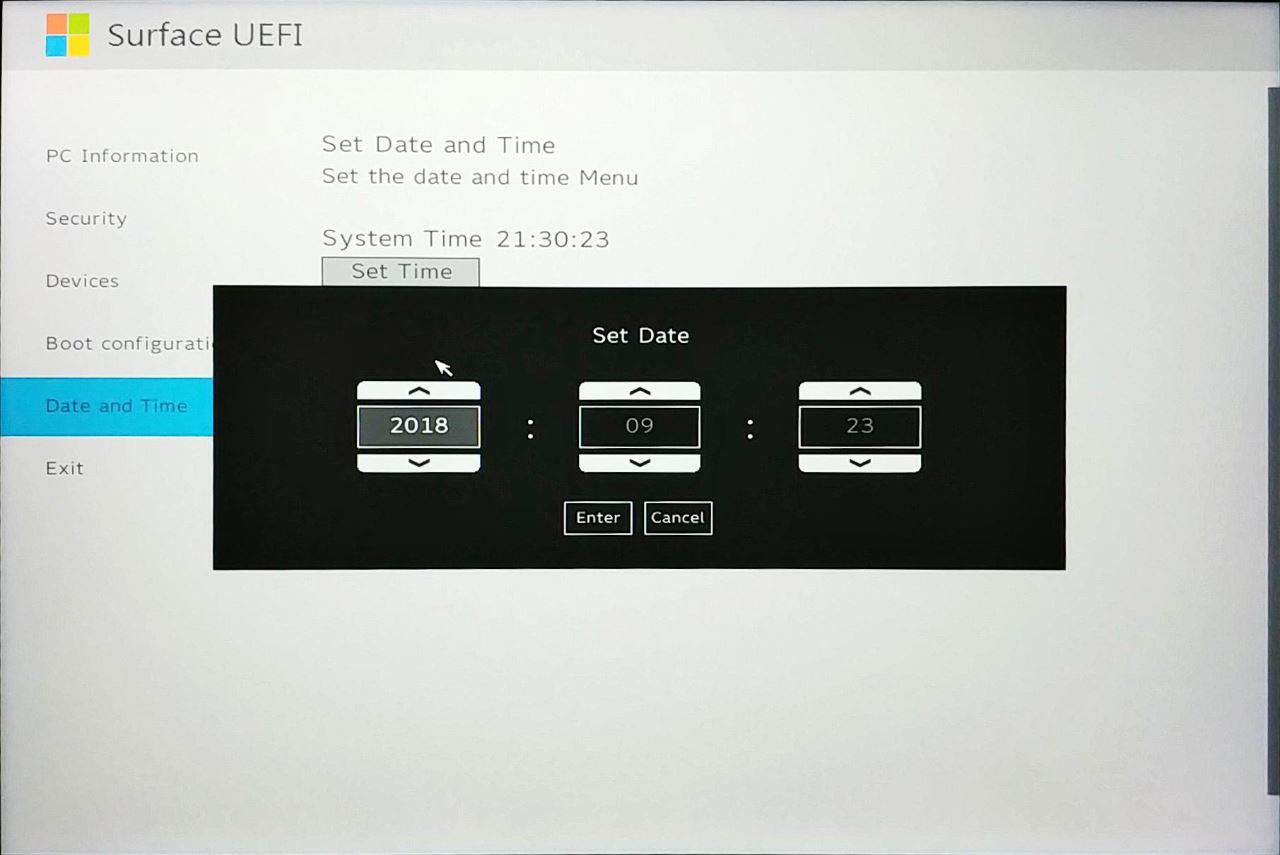
- In the Surface UEFI menu, go to the Date and Time page as below:
- To set a new time, click Set Time.

- To set a new date, click Set Date.
- Press Enter to apply changes.

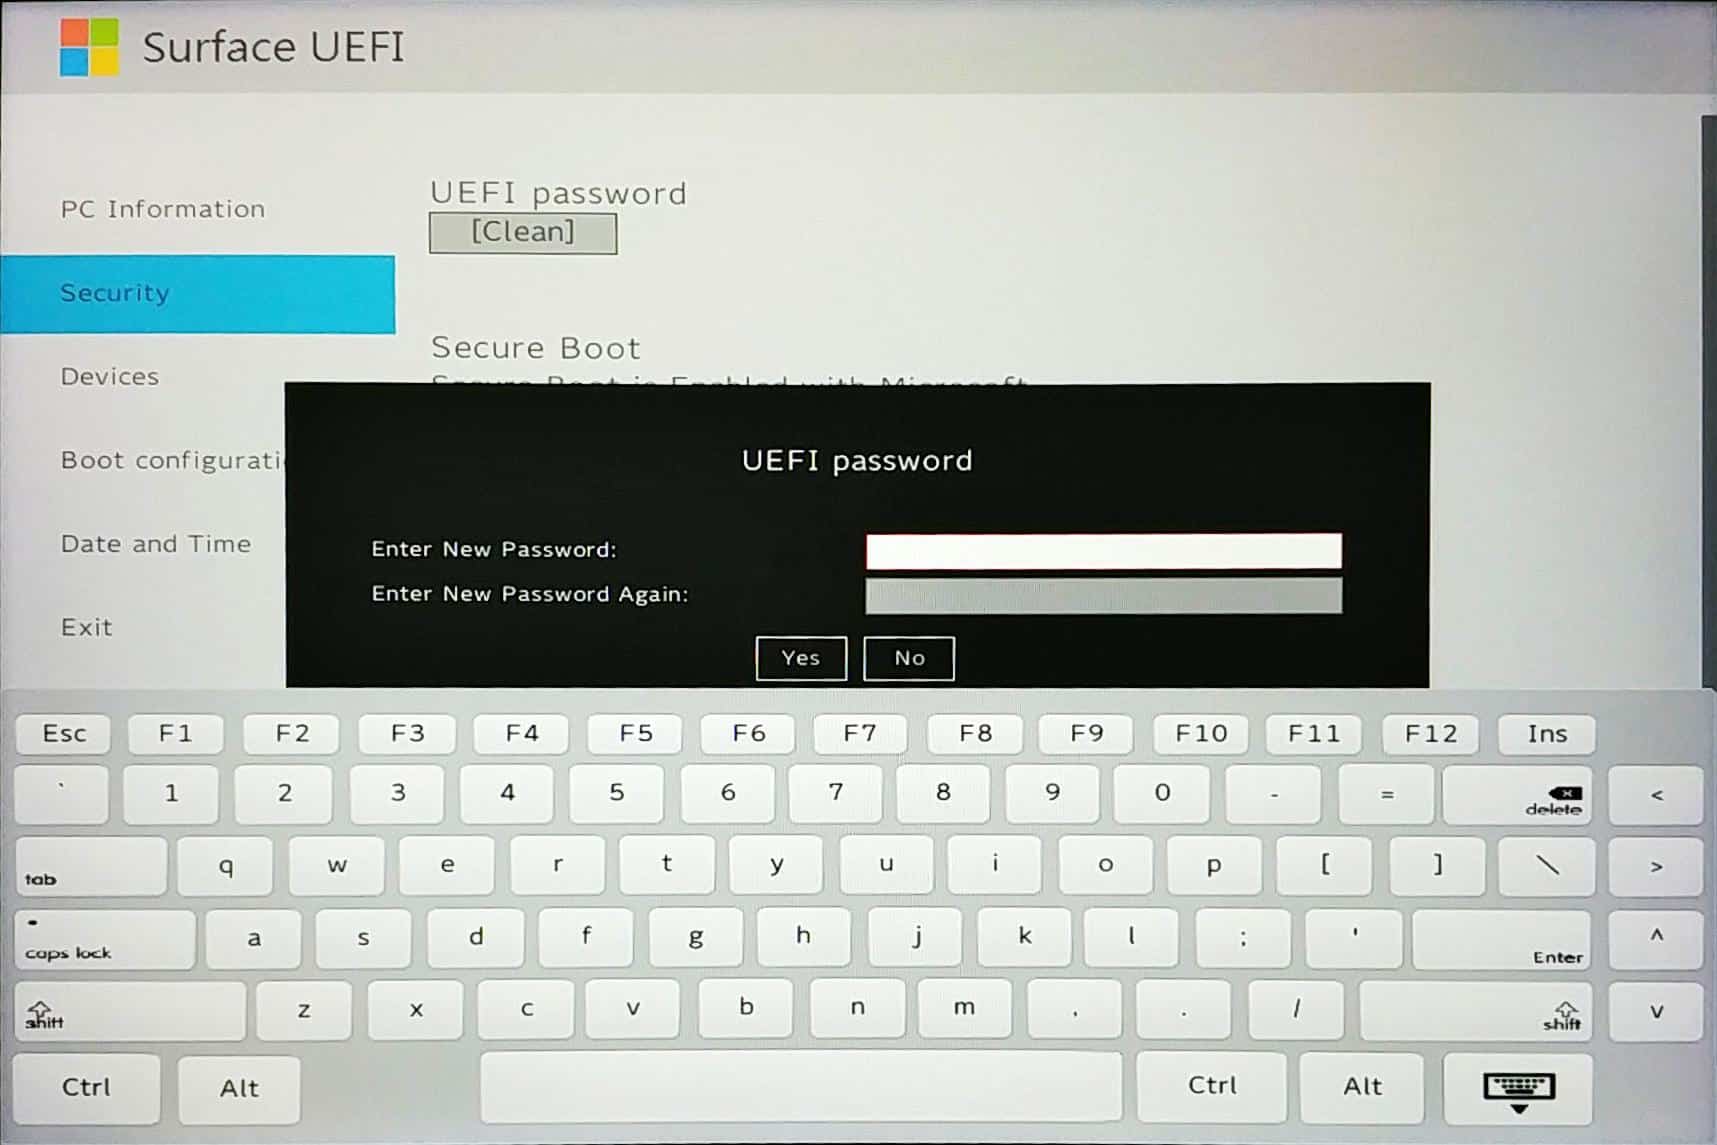
How do you protect UEFI settings with a password on Surface Go?
You can prevent others from changing your UEFI settings by setting an Administrator Password in UEFI settings. To do that:
- Enter Surface UEFI settings as per the instructions above.
- In the UEFI settings menu, select Security.
- Under the UEFI password, click the [Clean] button to create a UEFI password.

- You will need to enter a password in the box with your keyboard or the on-screen keyboard with the following criteria:
- Minimum Length: 6 characters
- Maximum Length: 128 characters
- It may contain a combination of letters, numbers, and special characters.
- If you have set the password before and want to remove it, leave the password box blank.
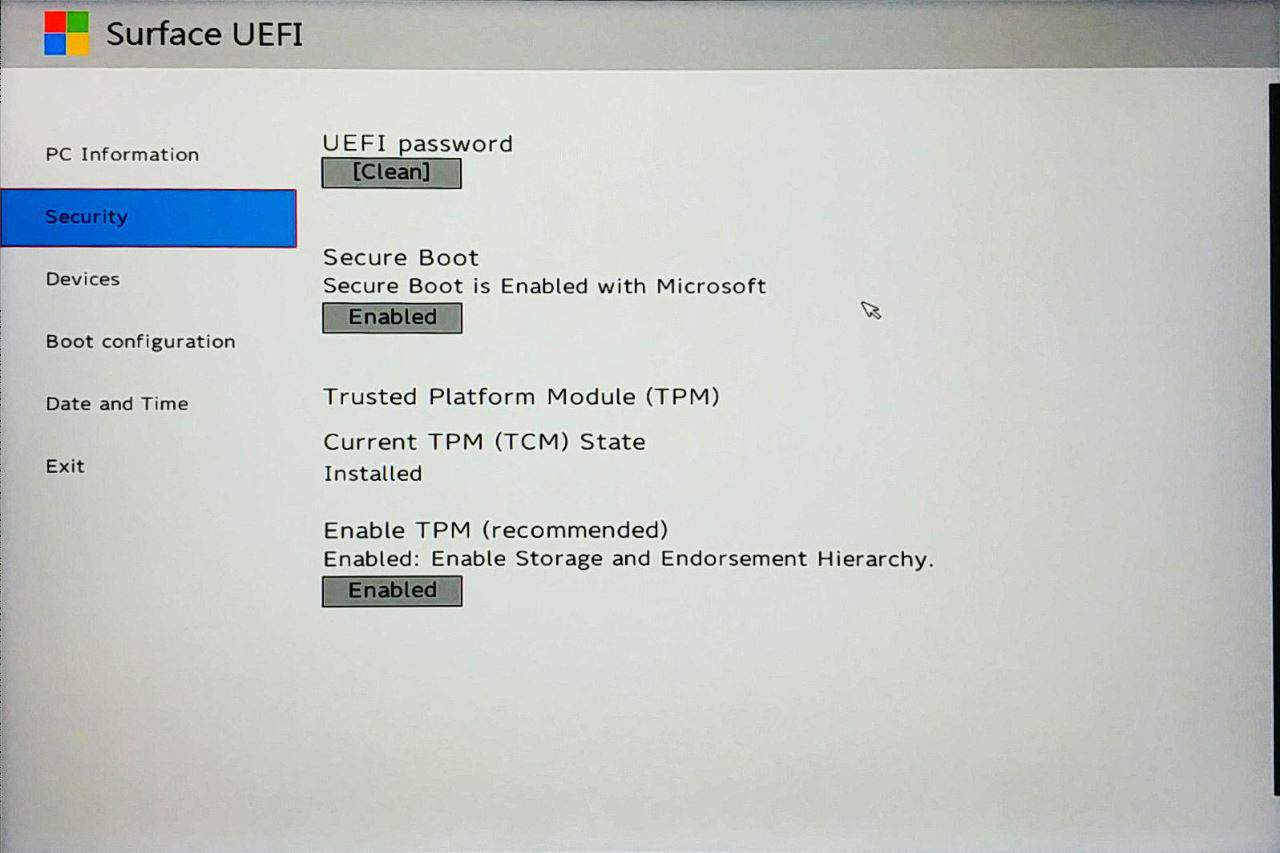
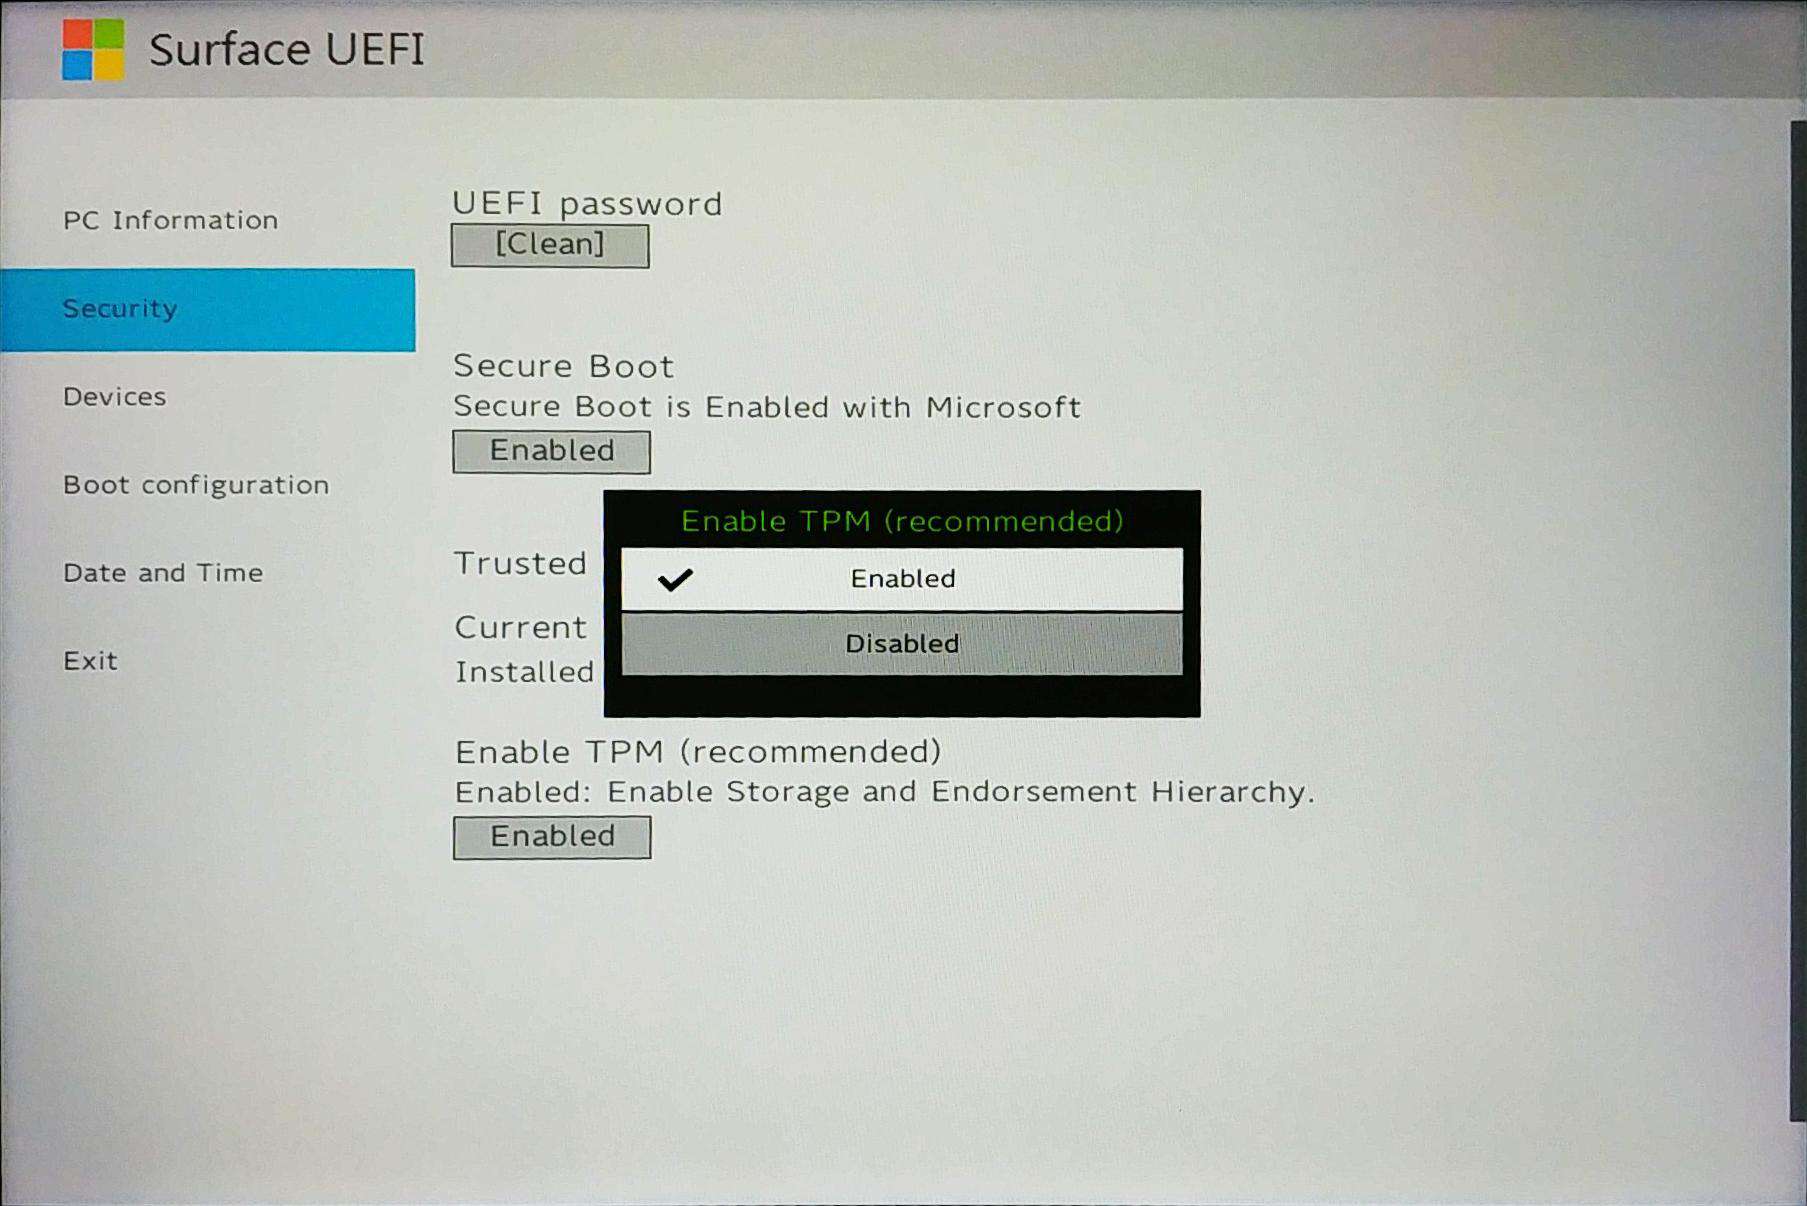
What is the Trusted Platform Module (TPM)?
The Trusted Platform Module (TPM) technology significantly advances BIOS in hardware-based security features. It is a specialized chip that stores RSA encryption keys specific to each Surface device for hardware authentication.
The TPM technology is a requirement of BitLocker disk encryption. The TPM helps you encrypt/decrypt the entire disk without requiring complex long passphrases. It means the encryption and decryption keys are stored within the TPM chip. So, your encrypted disks can’t be accessed on other devices.
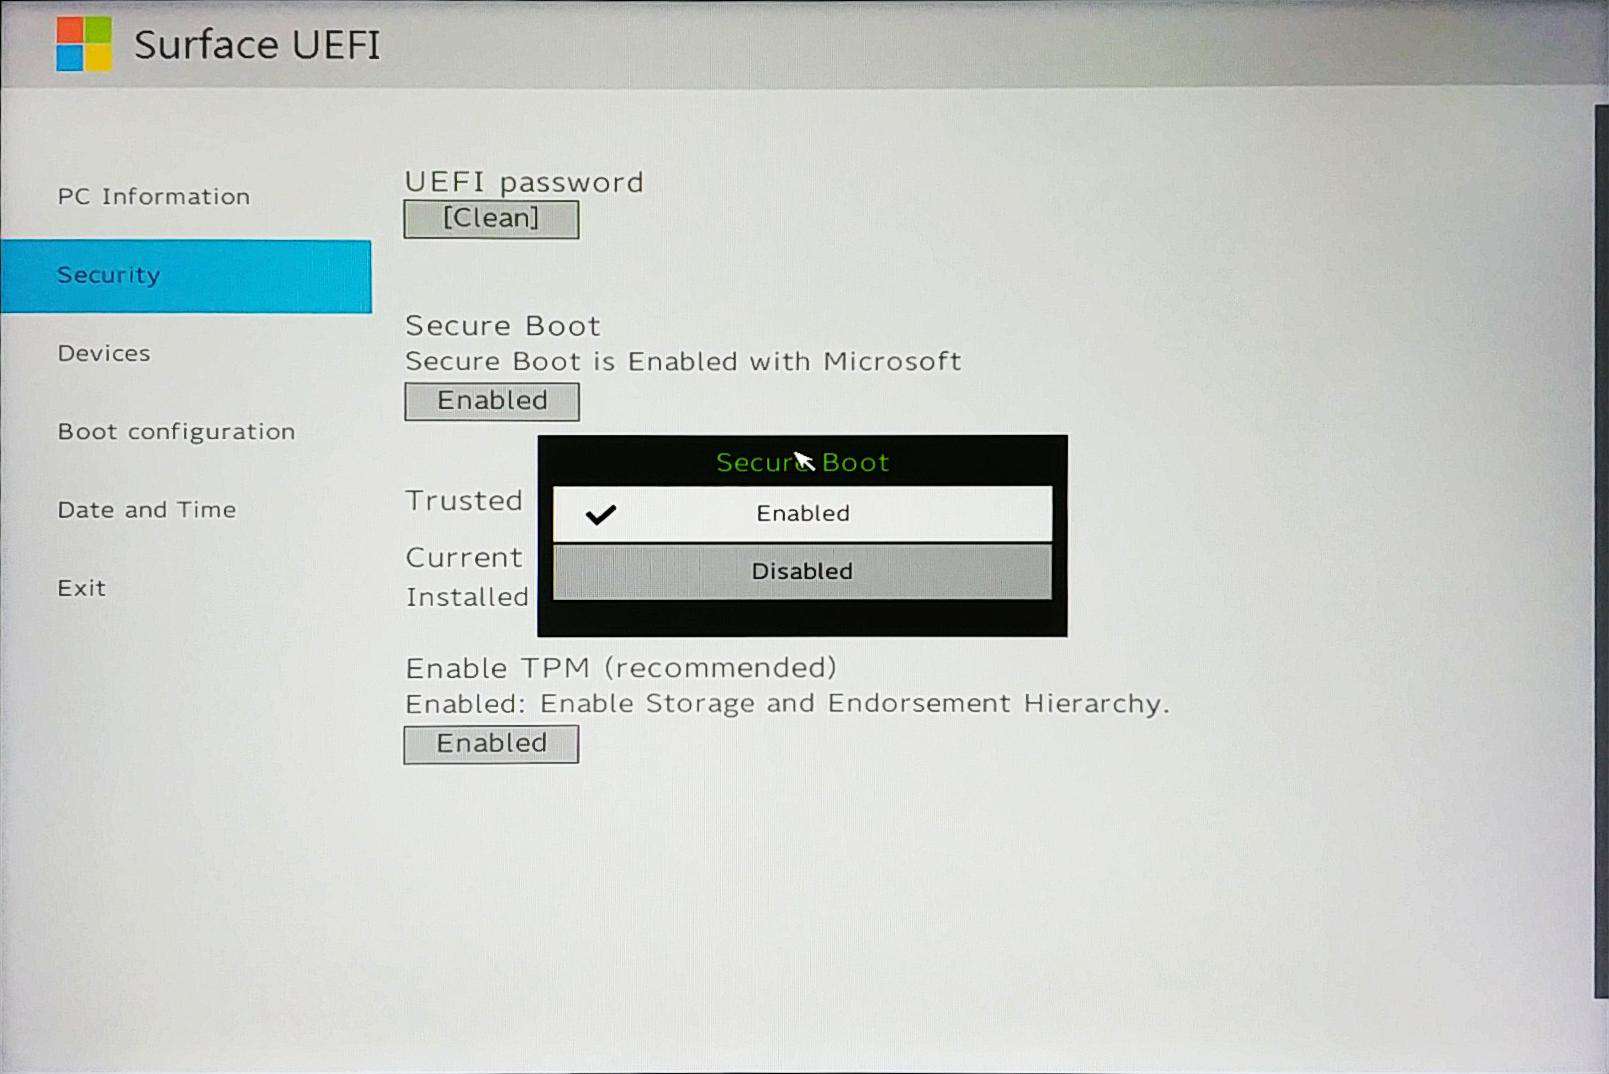
What is Secure Boot Control?
The Secure Boot is a technology that blocks the loading of uncertified bootloaders and drives. It helps to prevent your Surface from being loaded with unauthorized operating systems and malicious software applications.
If you desire to install other operating systems like Ubuntu or other Linux distributions, you may need to turn off this feature in the UEFI settings above.
Other Surface’s UEFI Settings
We have also covered this topic for other Surface PCs as well. To learn more about other Surface UEFI settings, check the link below:
- Surface Go UEFI Settings
- Surface 3 UEFI Settings
- Surface Pro 3 UEFI Settings
- Surface Pro 4 UEFI Settings
- Surface Pro (2017) UEFI Settings
- Surface Book UEFI Settings
More Surface Go Resources
Make sure to check out our tips and tricks for Microsoft Surface Go here:


COMMENTS
Let us know what you think!
We appreciate hearing your thoughts, questions, and ideas about “How to configure Surface Go UEFI/BIOS settings”.
Hi my name is Gary Carlson I do a lot of scaping one of the apartment complex I found a Microsoft surface the hard drive was enscripted and was asking for bitlocker password long story short I formated the hard drive every thing went great but now when I turn it on it goes to bios password screen i made a USB bootup disk and it don’t work even with valume key what can I do
I had a free update on my Surface go 2. From windows 10 to 11. After installing the pc started randomly doing odd things on it’s on. So I tried resetting to factory conditions & it’s stuck at 64% with the screen flashing. No option for a keyboard or anything else. Why can I do?