Microsoft Surface Book is the most powerful laptop lineup from Microsoft that is designed to deliver incredible performance and versatility to meet the demands of professional creative works. Its cutting-edge technologies include the 100 percent sRGB PixelSense™ display, Windows 10 Pro, all-day battery life, and the latest processing components.
Among those, the discrete GPU is one of the key distinguishing features of Microsoft Surface Book to differentiate itself from other Surface lineups. It’s beneficial in creating 3D content, editing photos and videos, and playing games.
However, there are still some situations you might want to skip the discrete GPU to exclusively use the integrated Intel graphics to handle specific tasks for better performance and power efficiency. Today, I will show you the three different methods to disable the discrete GPU on your Surface Book.
Table of contents
How to disable Surface Book’s discrete GPU by detaching from the base
This is a straightforward method that you can use to force your apps or games to run with the integrated GPU by detaching the clipboard section from the base, which contains the accelerated graphics processing unit while launching the app or game. To do so:
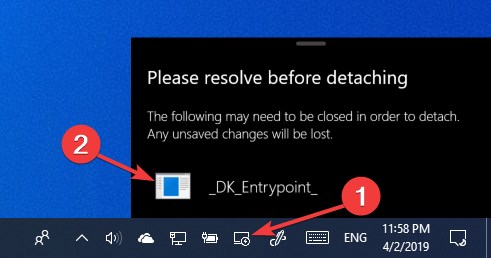
- Press and hold the Detach key on the keyboard for a few seconds, or click the Surface Detach icon inside the taskbar.
- If you didn’t close all apps and games that are currently using the dGPU, it shows an error message below:

- Close all those detected apps and games and try to detach them again.

- When it’s ready to detach, detach the clipboard section from the base.
- Launch your app or game and wait until it’s completely loaded. The app or game will use integrated graphics.
- You can now reattach the clipboard to the base.

How to disable Surface Book’s discrete GPU via Device Manager
Here is another approach to turn off the discrete GPU on Surface Book and Surface Book 2 using the Device Manager management console. To do so:
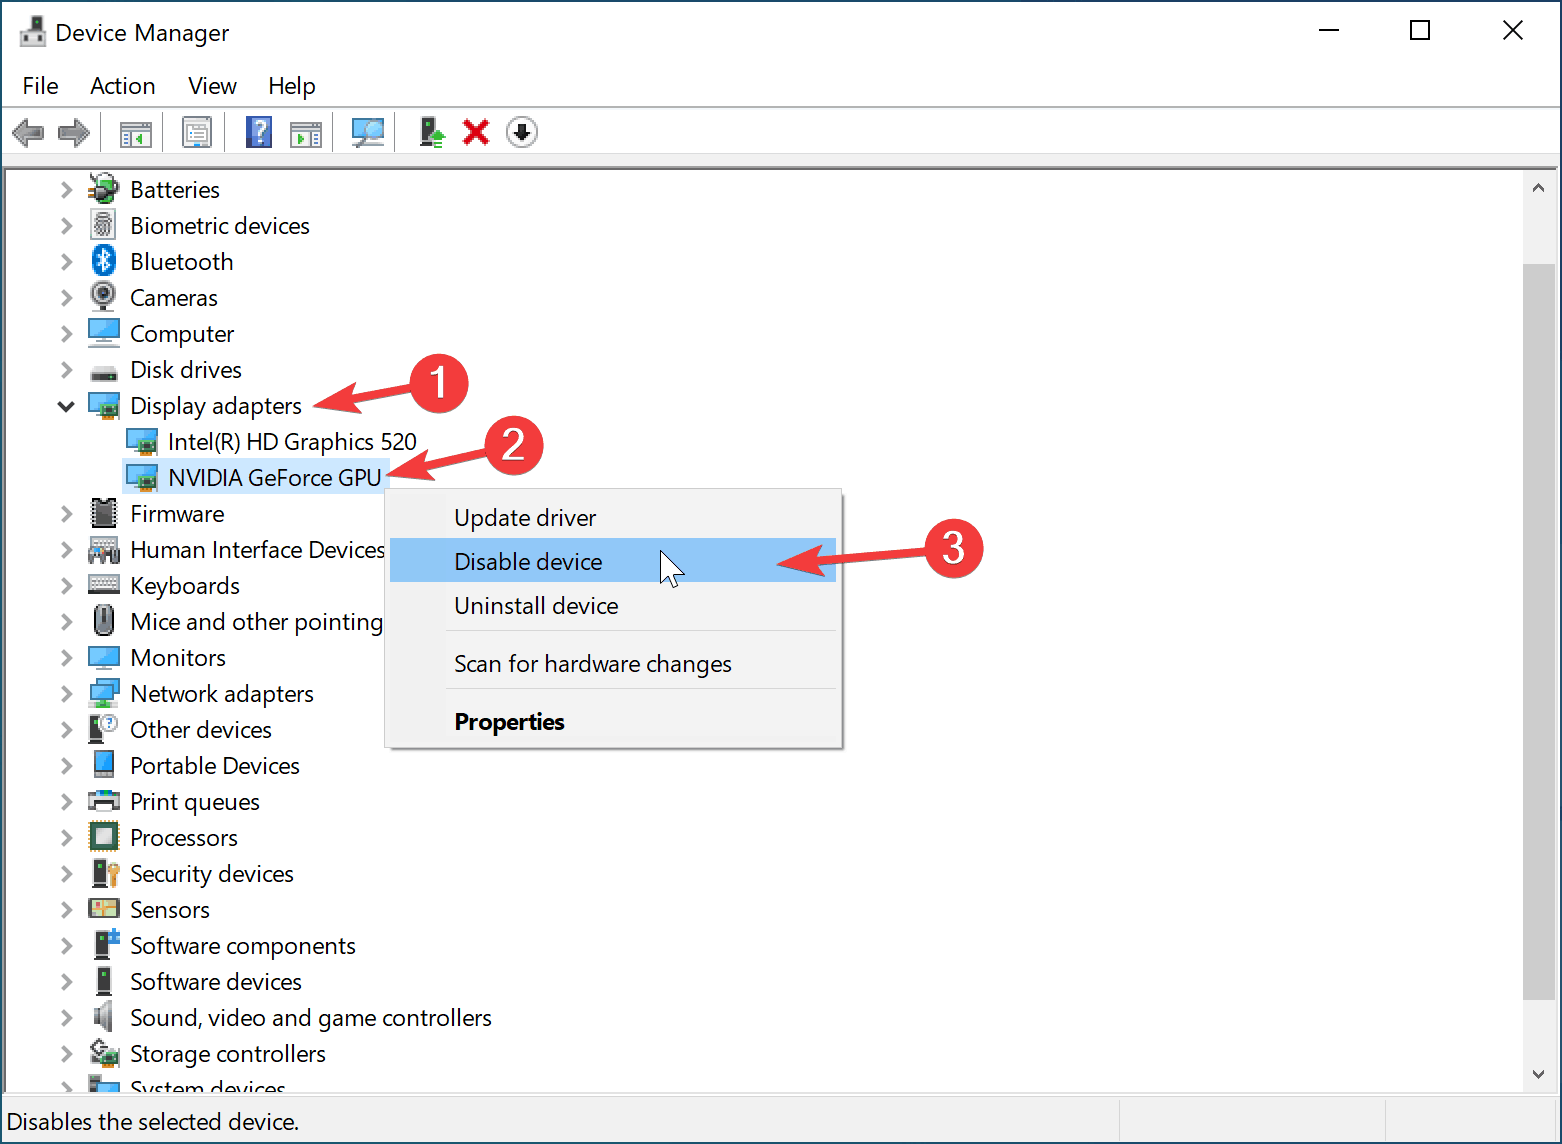
- Right-click the Start icon, and go to Device Manager.

- In the device tree, locate and expand the Display adapters.
- Right-click on NVIDIA GeForce GPU, and select Disable device.

- It will turn off the device, and you will see a disabled status appear under the NVIDIA GeForce GPU as below:


How to disable Surface Book’s discrete GPU via UEFI settings
Another method is to turn off the discrete GPU on your Surface Book via UEFI settings. It will completely hide the discrete GPU from your system for better performance and security. To do so:
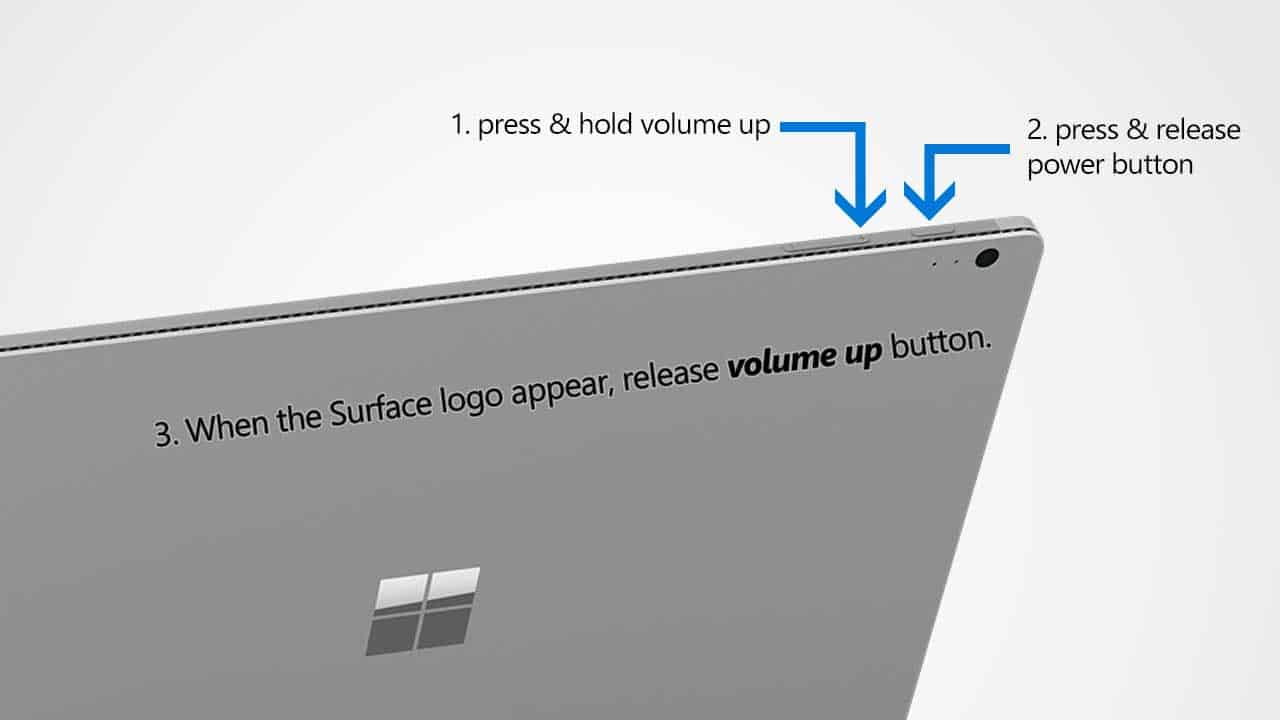
- Shut down your Surface Book.
- Press and hold the Volume Up button on your Surface, then press and release the Power button.
- When you see the Surface logo screen appear, release the Volume Up button. The Surface UEFI screen will appear in a few seconds.

- It will display the Surface UEFI configuration page as below:

- Go to the Devices section, and you will see the option to turn the “DGPU on/off” on the Devices page as below.

- Toggle the DGPU to turn off the discrete GPU on your Surface Book.

- In the Surface UEFI menu, go to Exit and click on Restart Now.

- It will save your settings and restart your Surface.
- Now you can see that the “NVIDIA GeForce GPU” no longer appears in the device manager.


Conclusion
With the three methods, you can prevent an app or game from running with the discrete GPU, which sometimes causes issues and battery drain. Please comment below if you have any questions or problems with the procedures detailed in this tutorial.


COMMENTS
Let us know what you think!
We appreciate hearing your thoughts, questions, and ideas about “How to disable the discrete GPU on Microsoft Surface Book”.