My Surface Precision Mouse has recently experienced a very poor battery performance that I can’t even switch scrolling behavior without plugged in the charging cable even at its full battery. Here are some photos of what it looks like on the inside of the Microsoft Surface Precision Mouse while I tore it down.
How to Tear Down Microsoft Surface Precision Mouse
- Remove the top cover.
To get inside the Surface Precision Mouse, you need to pull the top cover of the mouse by starting from the left and right buttons.NoteYou might need a heat gun to loosen the excessive adhesive (likely a permanent glue) under the cover, or you will need to pull them very hard to get them separated.ImportantDo it at your own risk!!! As a result, my Surface Precision Mouse right-click button became unstable after tearing them apart. - Remove the 5 screws.
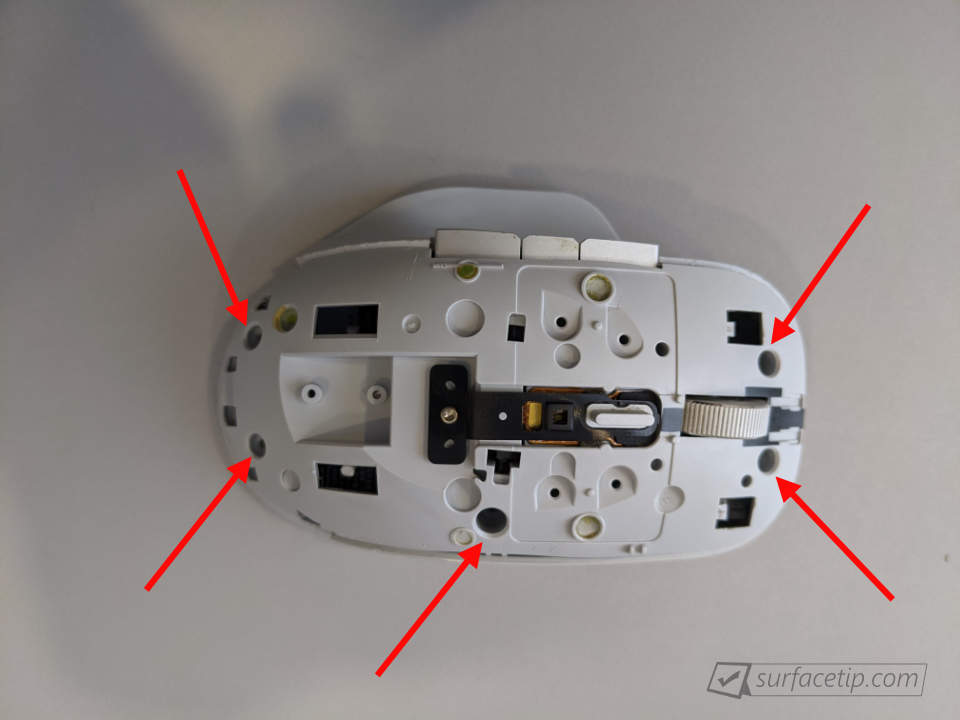
There are five Torx screws underneath the mouse cover. Remove those screws to get into the circuit board and battery section.
Surface Precision Mouse Screw Locations
- Disconnect the cable
Disconnect the cable between the circuit board and the top mouse cover board.Surface Precision Mouse Scrolling Mechanism
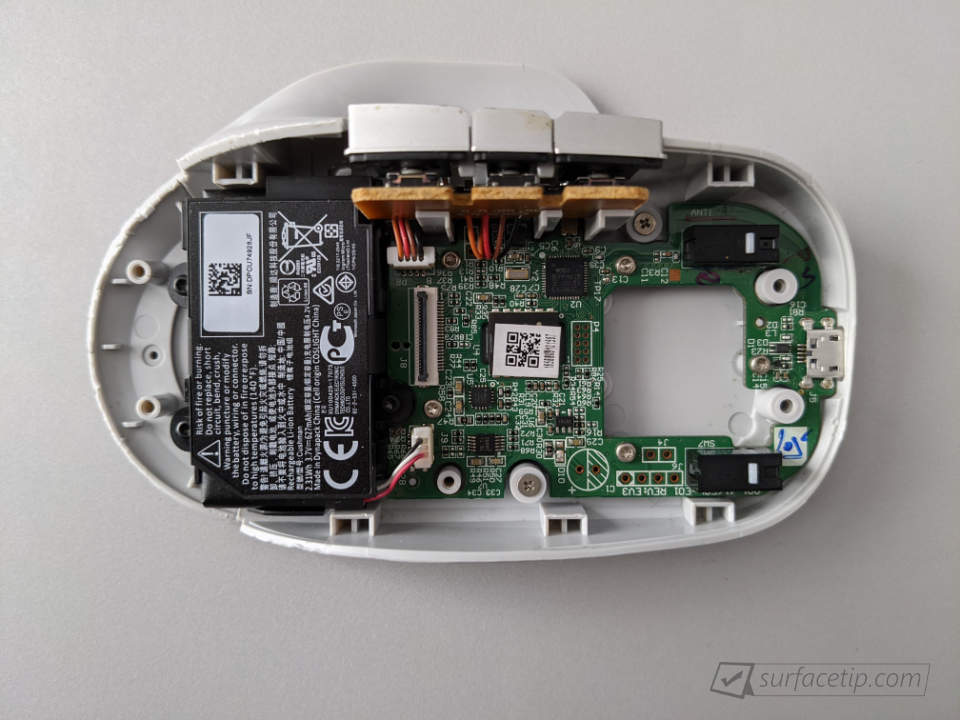
- Now, the disassembling is done. Here is the main circuit board of the Microsoft Surface Precision Mouse
Surface Precision Mouse Circuit Board
- The battery capacity is 2.31Wh (3.7V, 627 mAh), which can be easily disconnected and removed.
Surface Precision Mouse Battery 2.31 Wh (3.7V, 627 mAh)


COMMENTS
Let us know what you think!
We appreciate hearing your thoughts, questions, and ideas about “What’s Inside a Microsoft Surface Precision Mouse”.
What connector does the battery use?